If you don’t know what Procreate is, it is an amazing app for artists. It doesn’t matter if you are self-taught or naturally gifted. The app is the best there is, in my opinion, and if you like drawing with your Apple Pencil this is for you. I prefer a big iPad that I can see everything on while I’m drawing but it’s up to you. If you are drawing on Adobe Illustrator, please switch to this app instead, it will make your life thousands of times easier. I know because that’s what I was using. Procreate not only makes your art experience better it also can be used like photoshop- kind of- effects and distortion are amazing as well as color and saturation. I use it not only for art but as a tool for school including posters and infographics. I also illustrated Trichy Tillie on it. The newest update has a few new features you should know about and along the way, I will show you pictures to help.
- Effects

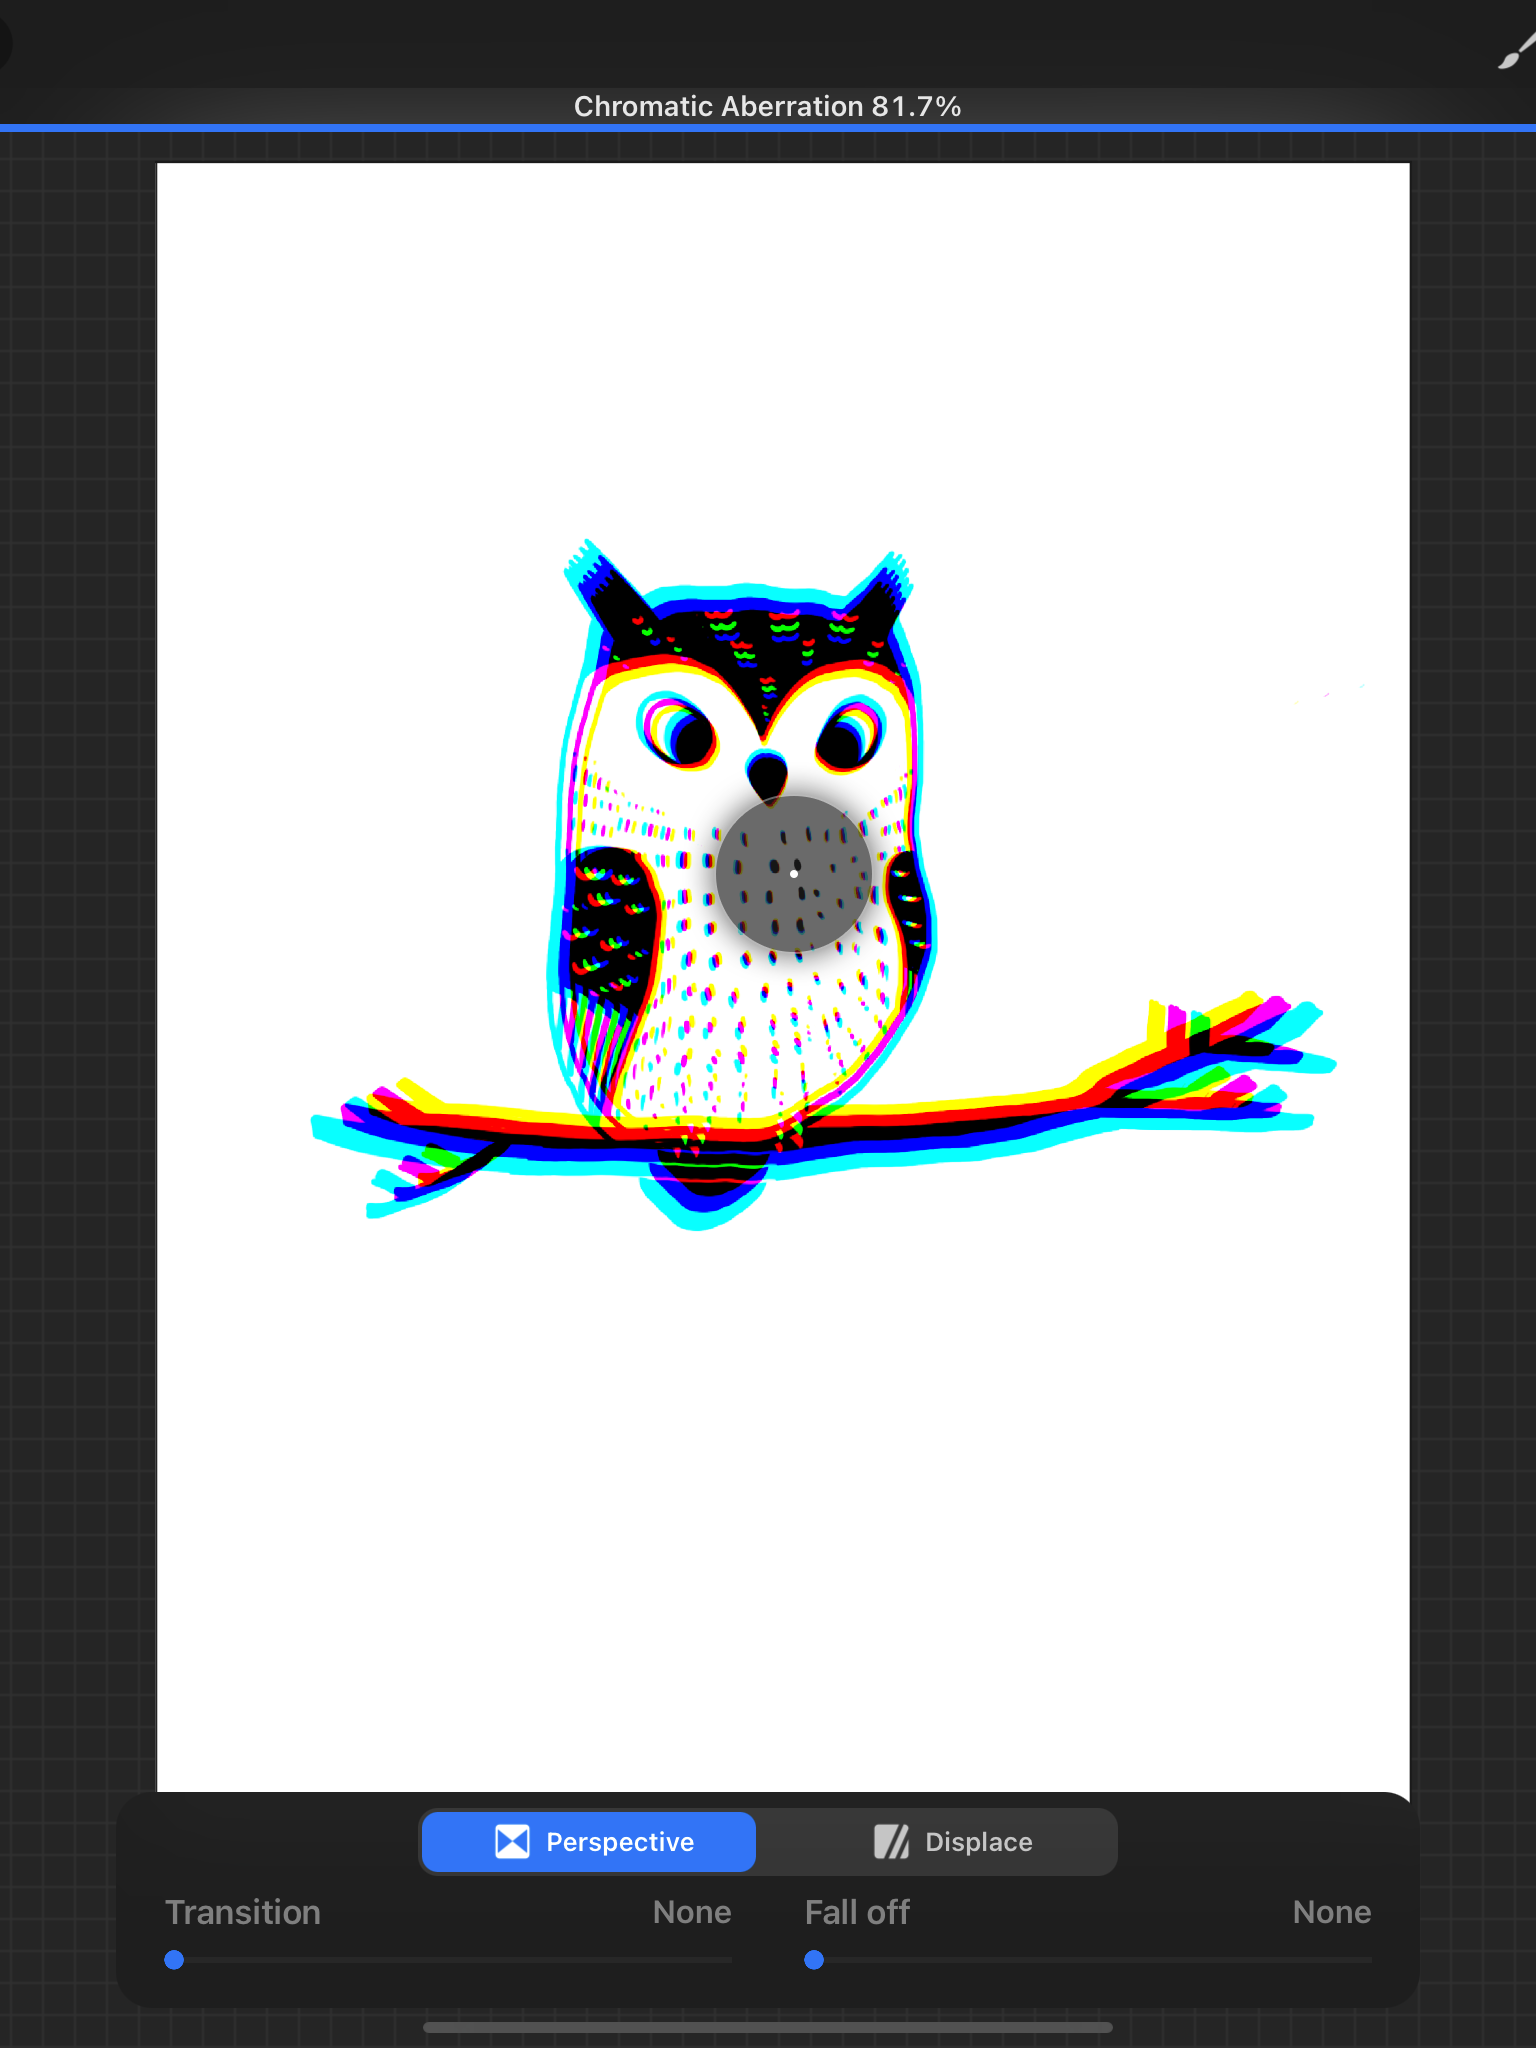
The first one is so cool. I’m not sure if it’s new or just updated but it’s called chromatic aberration. You can use it in displace or in perspective, they both use a chrome effect. Displace: duplicates and slides over your pre-image into the space already created, like an alpha lock. Perspective: moves outside of that space and duplicates the outline of the image. Either way, this gives your artwork some dimension.
Second is hue, saturation, and brightness
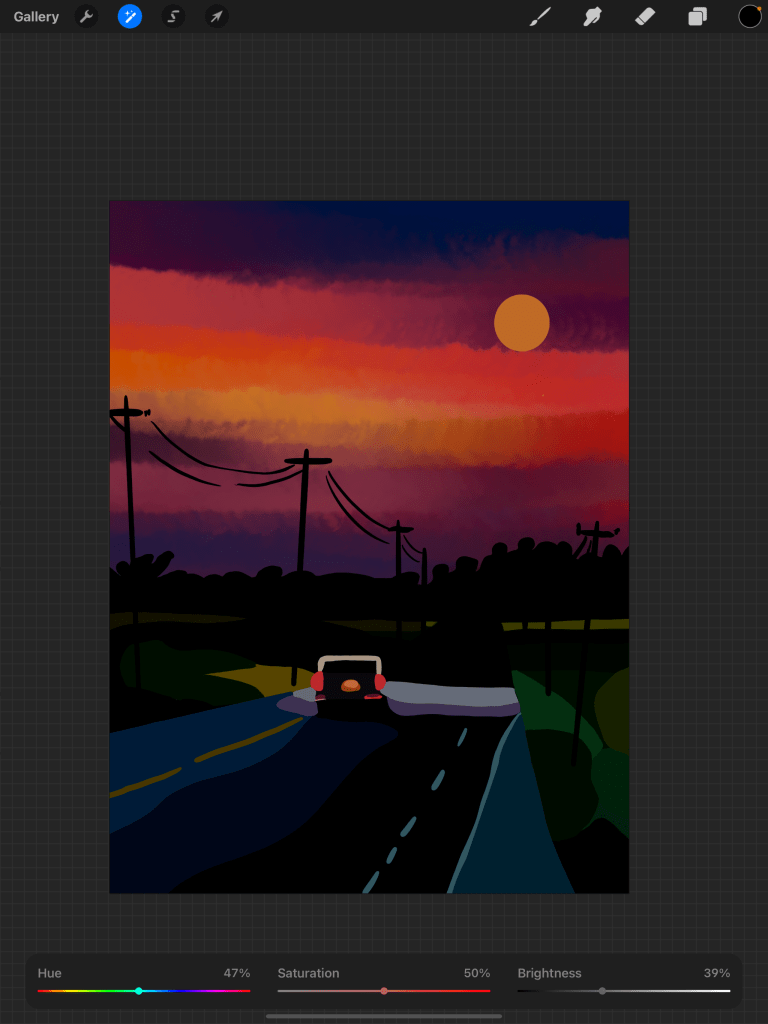
This will save you from having to edit photos. Allowing you to adjust brightness, saturation, and hue just like in the title. But this goes beyond just that.
Hue is responsible for completely changing the colors. In the examples, I mostly focus on the sky, effects that are specific for this image because it’s like the car is driving at night.
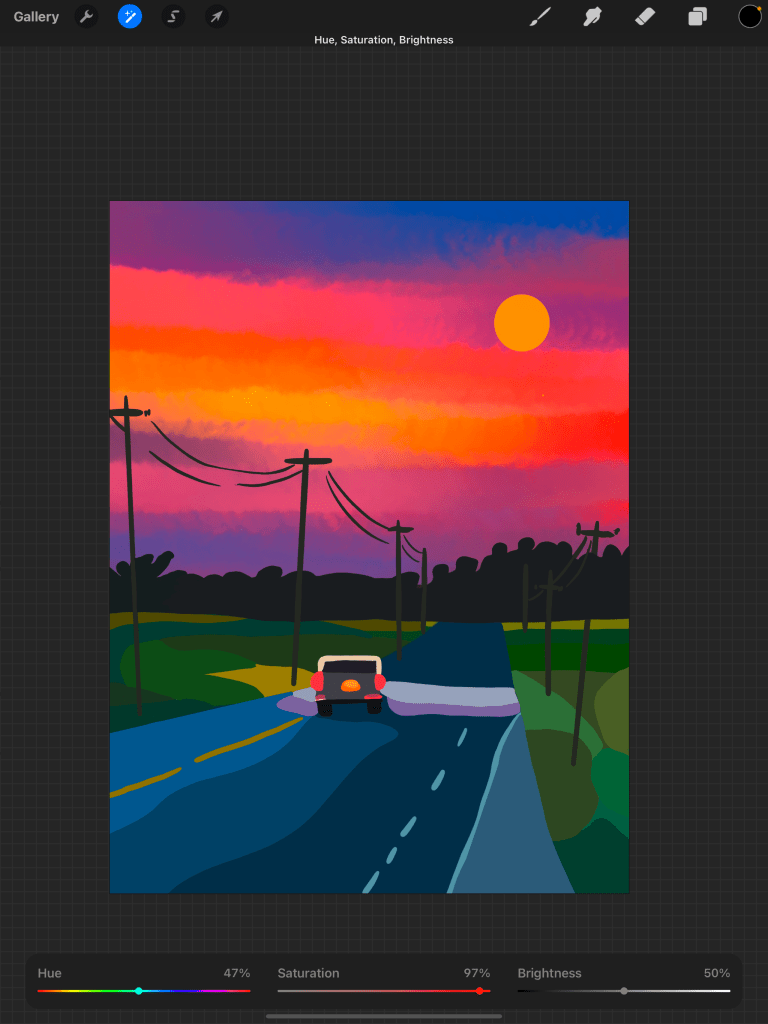
Here it’s still focused on the sky, but instead of the saturation turning up the brightness, I used saturation to make the sky seem brighter through the middle.
You don’t have to completely change the image, if you work on one layer the effect will be focused on just that. This helps the drawing look more realistic and less edited.
Next is Gradient map, like filters

Mocha filter 
Instant filter 
Venice filter
You can choose from already made filters or you can make your own. This takes your art up a notch by changing the color, again not making it look fake or edited.
The last one is halftone, my personal favorite

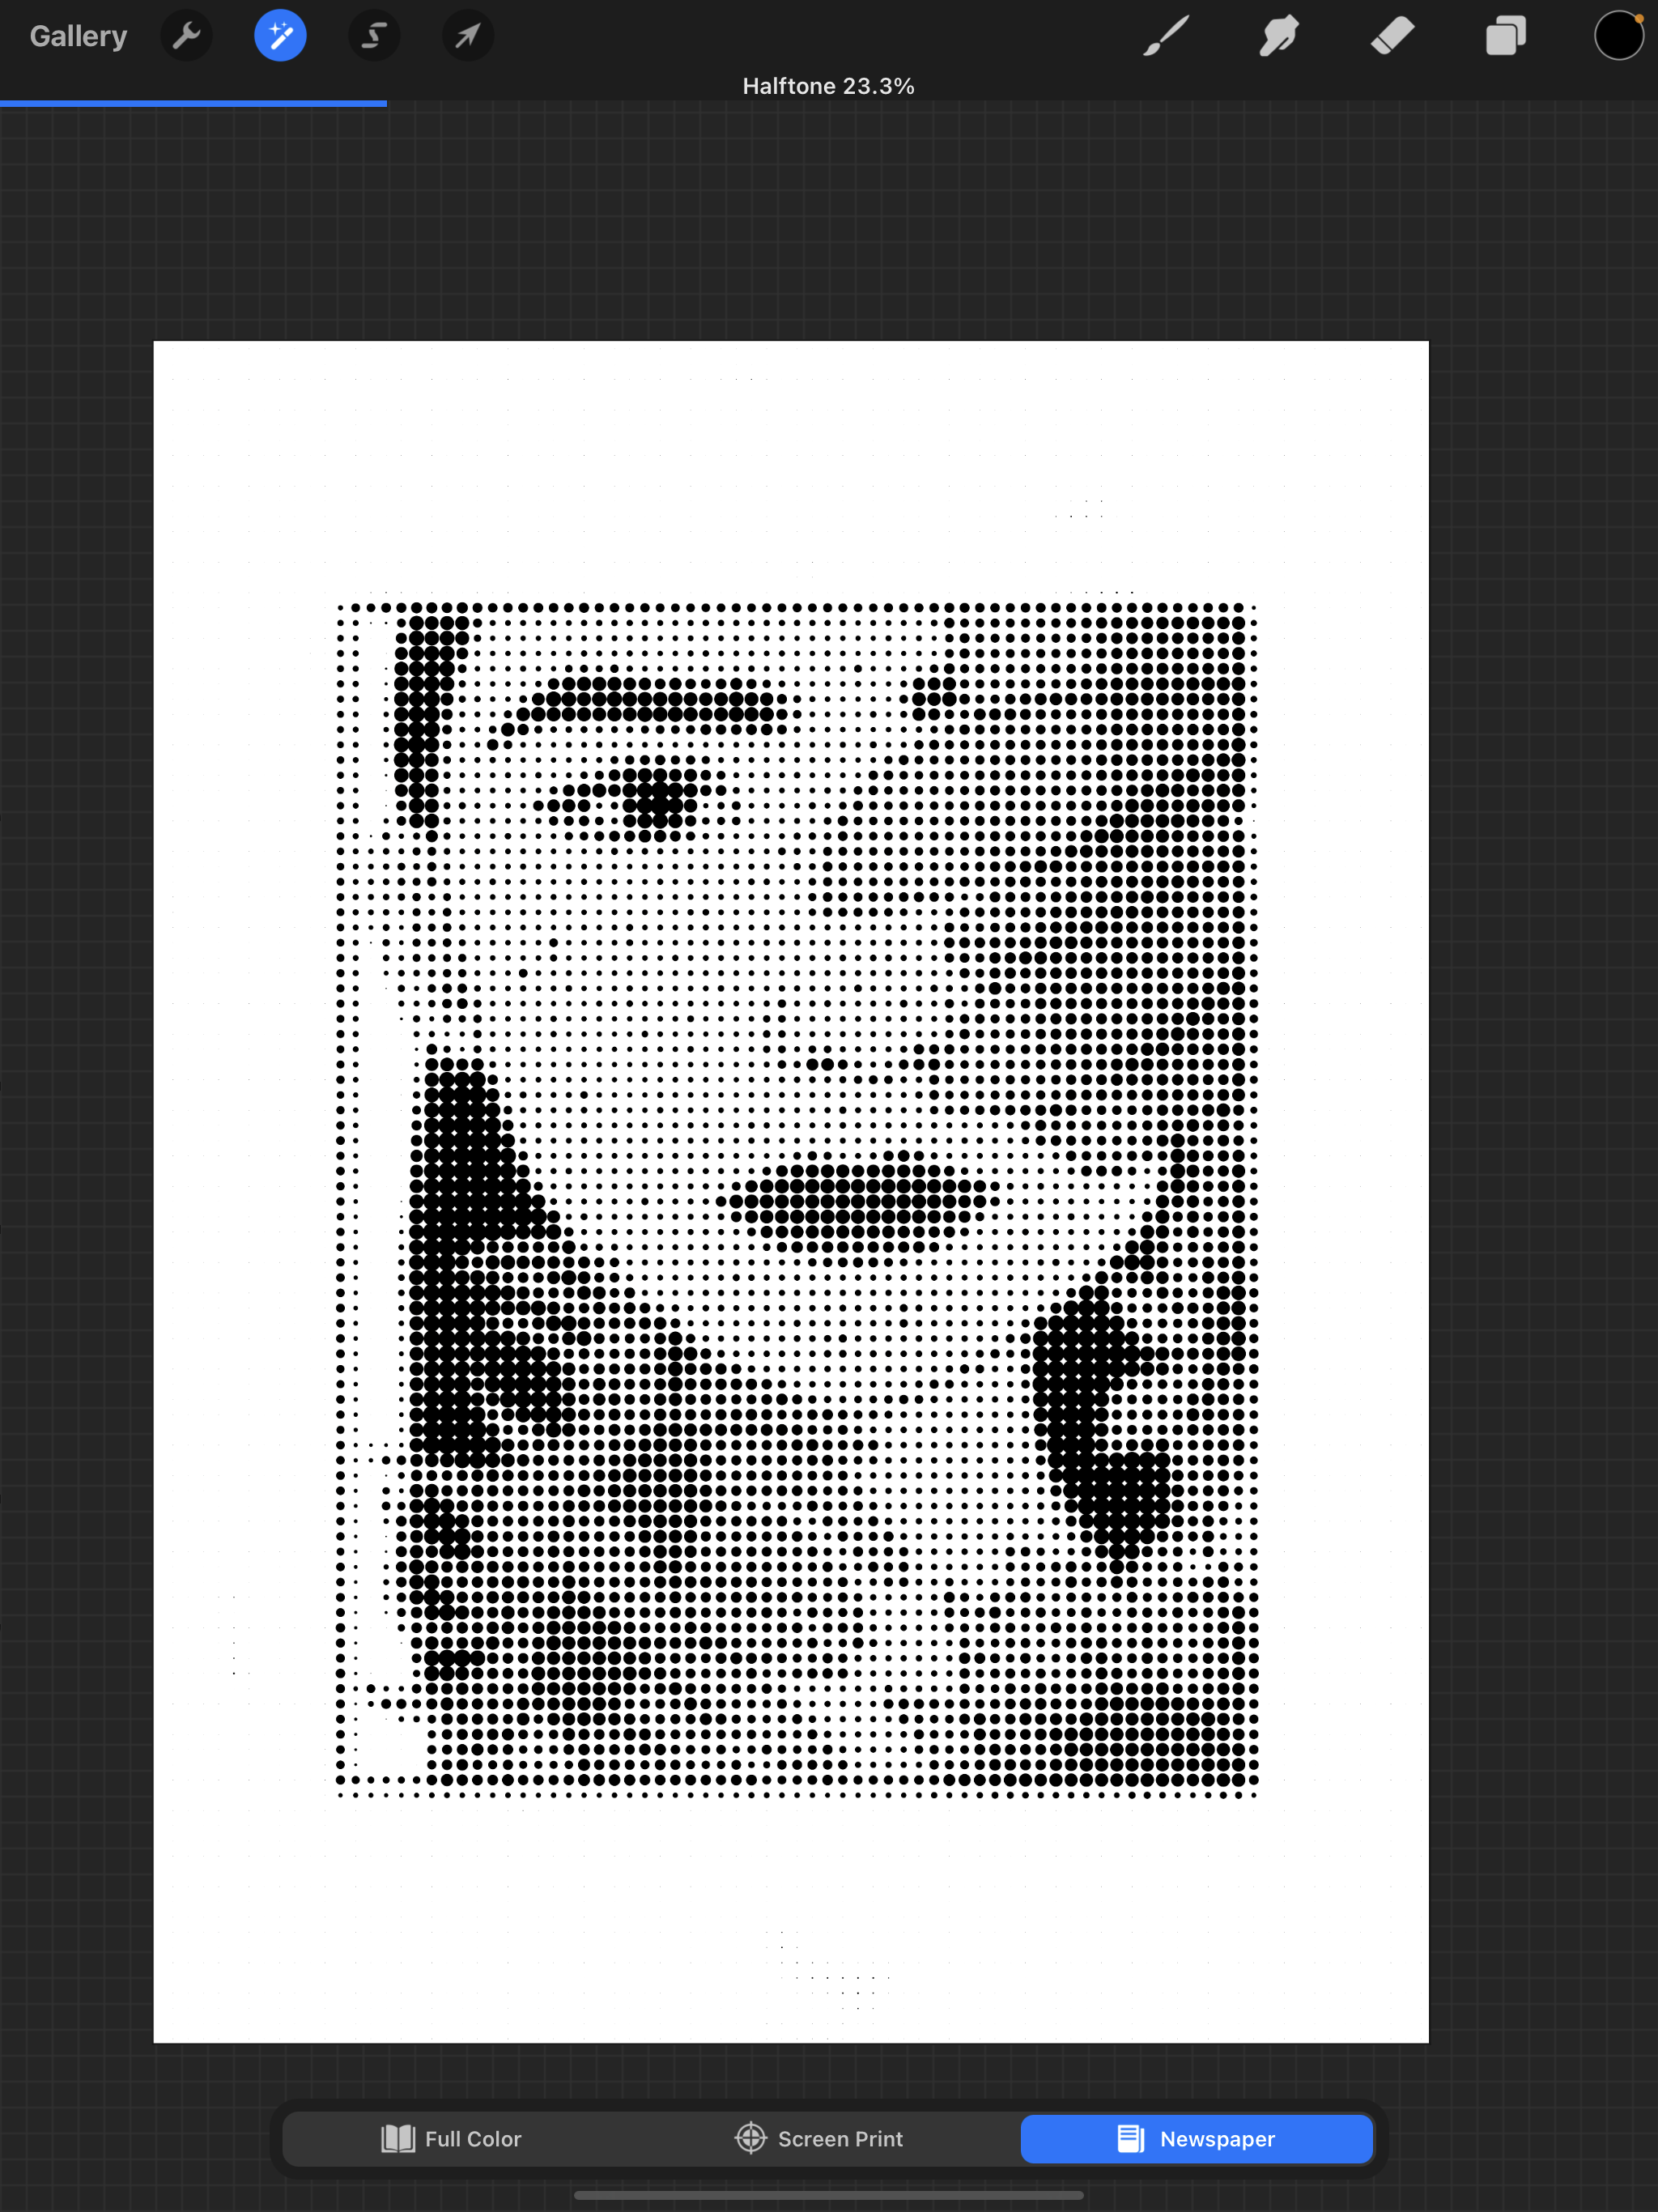
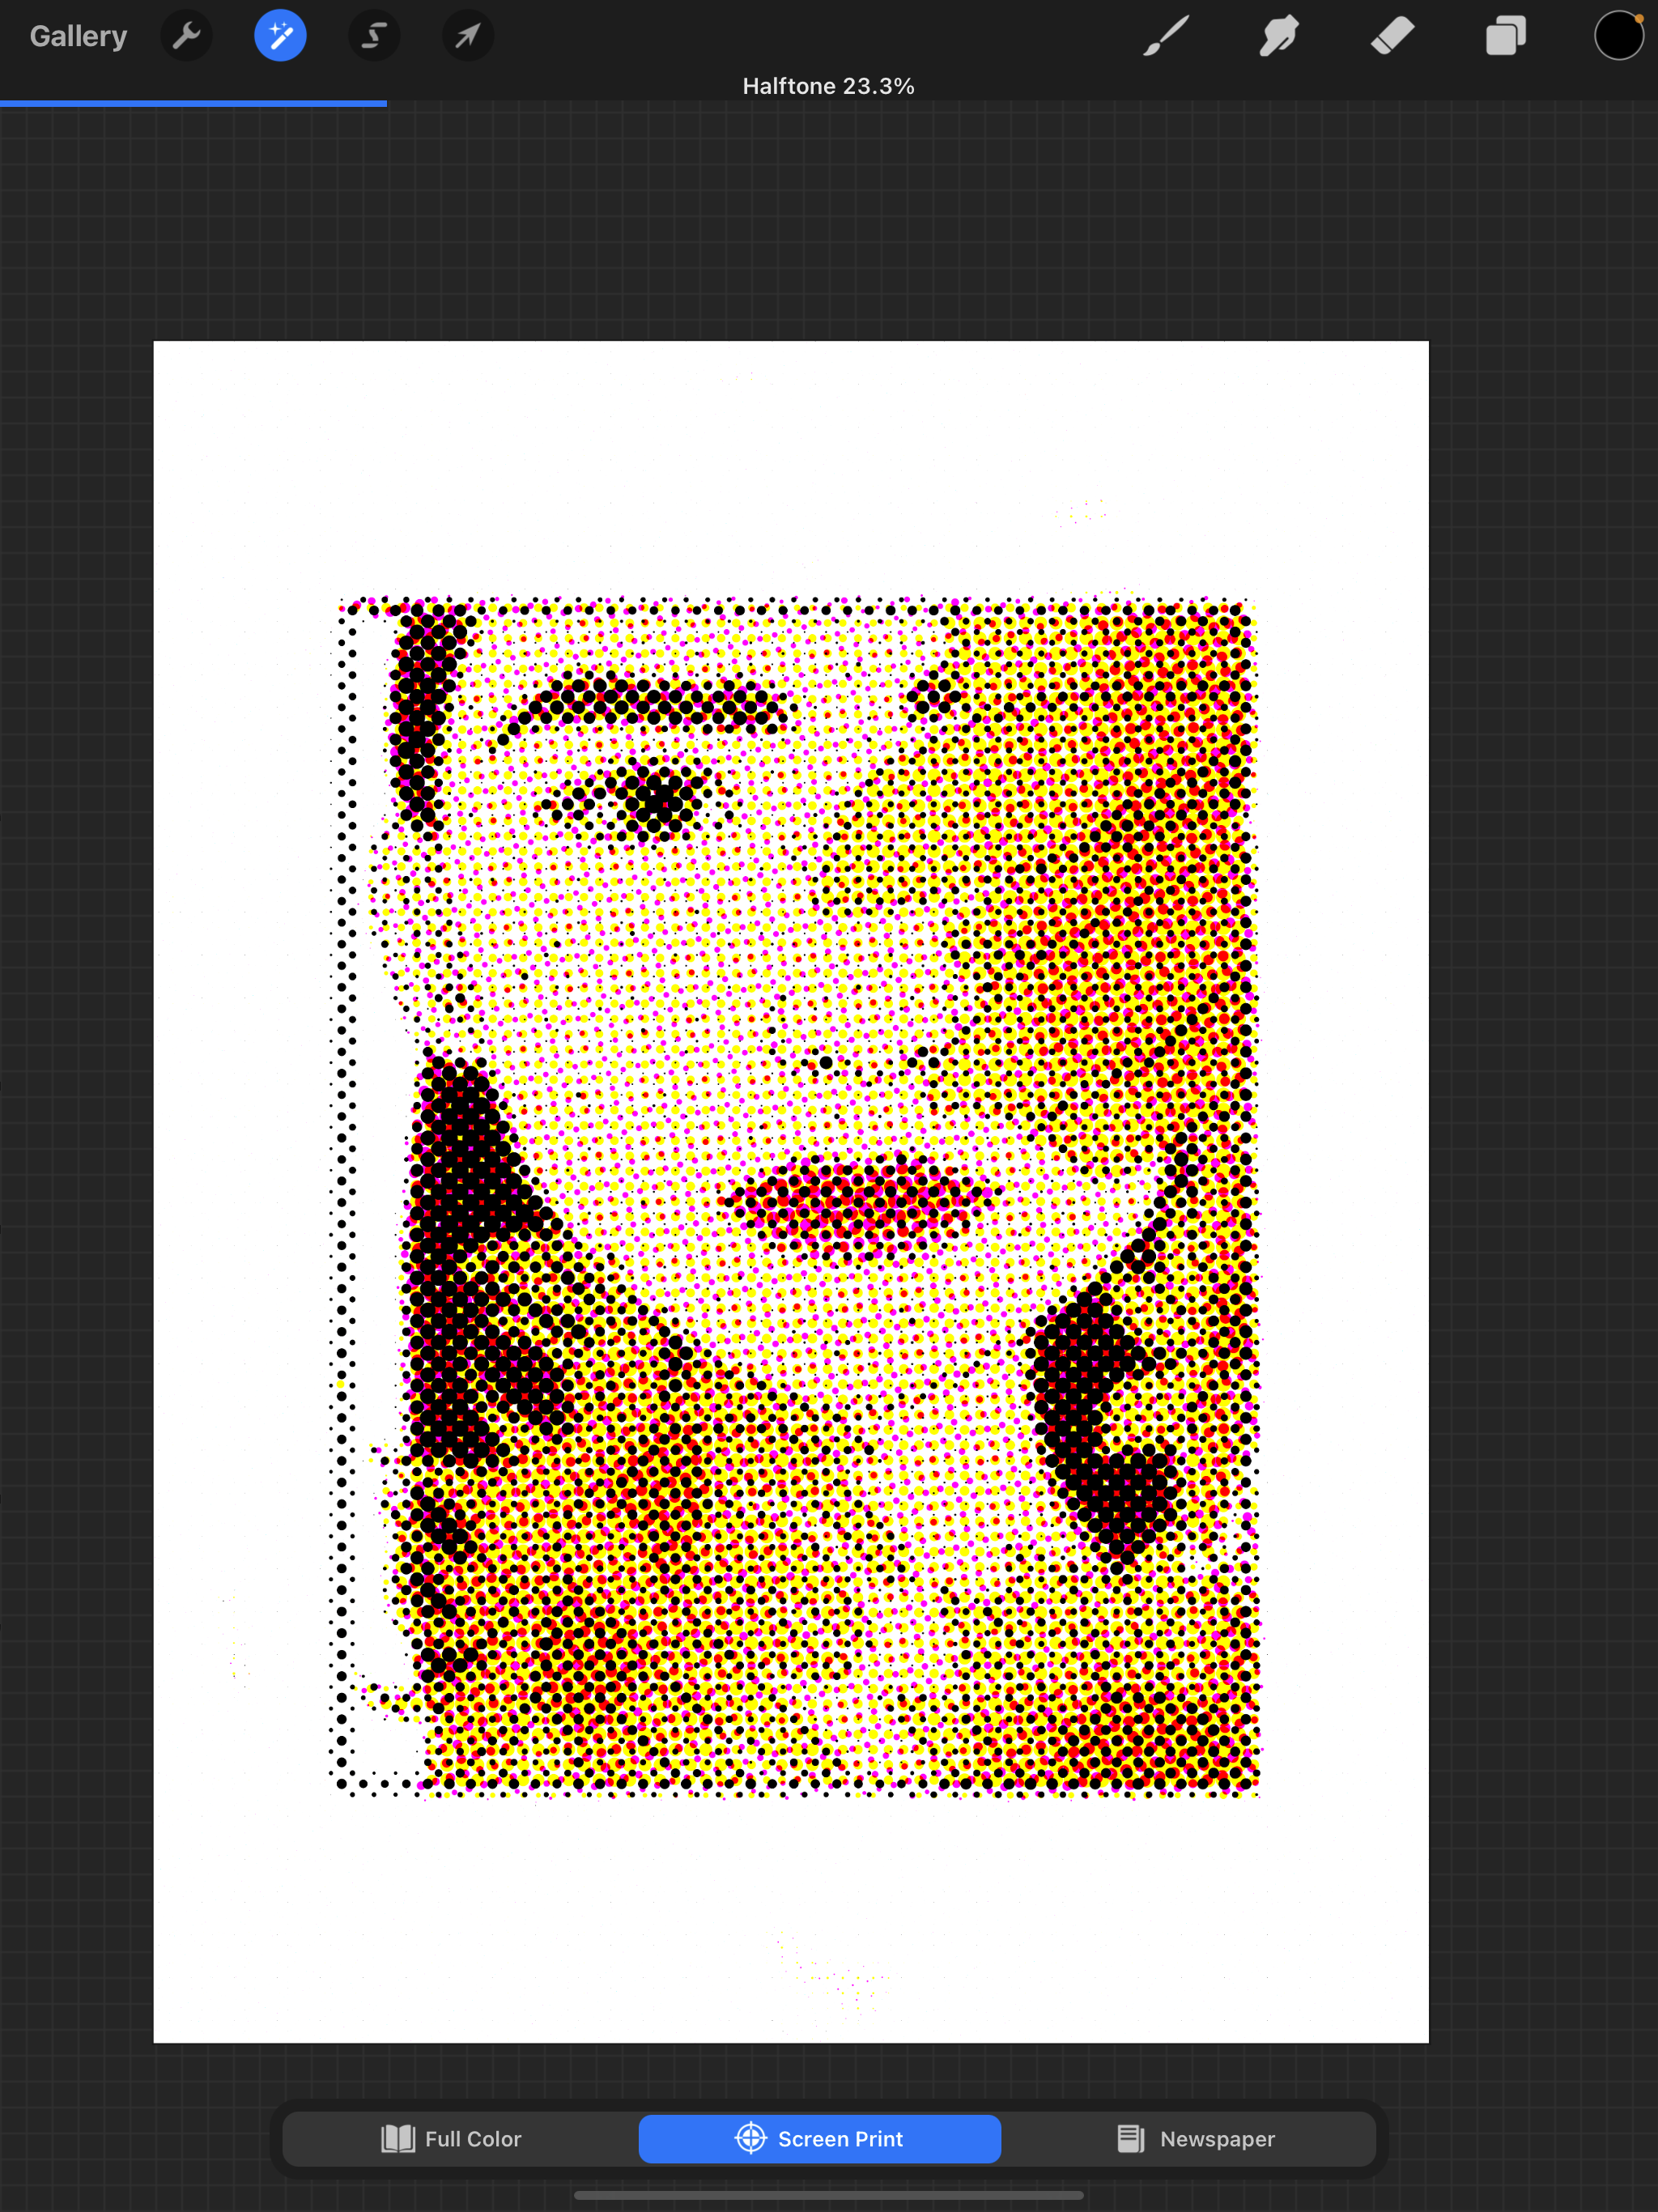
You can adjust how it affects the image/drawing. My favorite thing to use this filter for is for people and portraits. Newspaper is like a black and white filter and the other two are screen print and full color.
2. Private layers
Time-lapse is something you can show others when your artwork is done but what if you took notes or traced and you want a private layer that doesn’t show up? Private layers are something new that you can take advantage of. Private files and photos are two options. But what I want to see them create is just a private layer without anything else inside of it. To make a private layer go to insert a photo and swipe left.
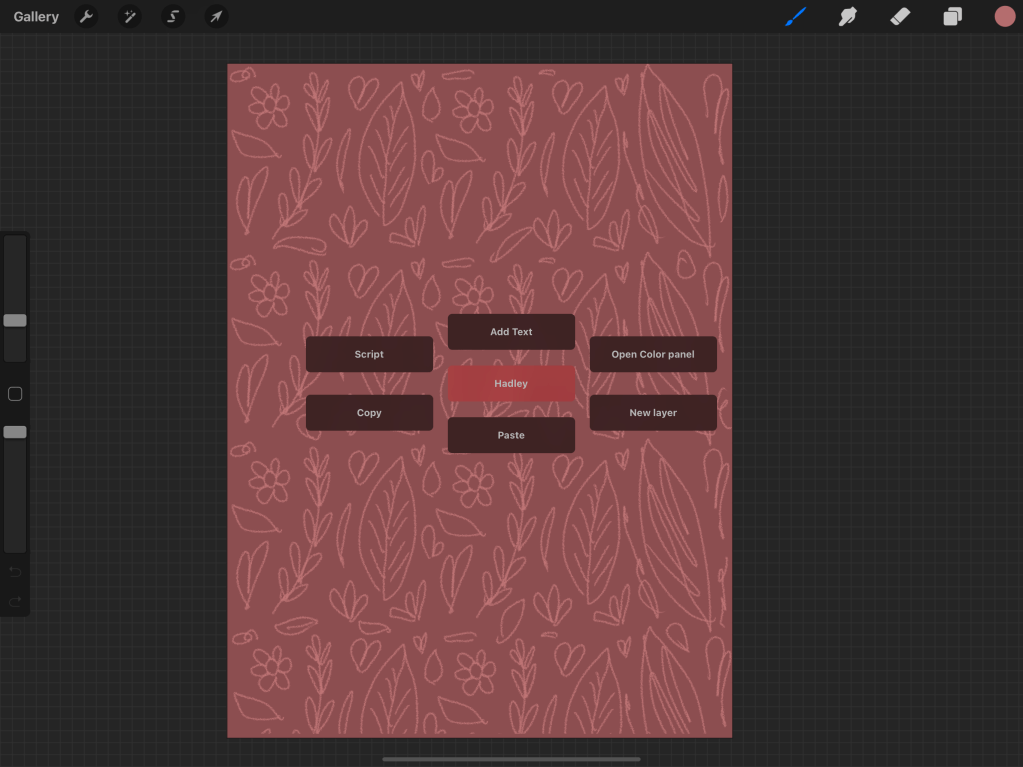
3. Quick Menu
If you are already a fan of Quick Menu then you will like this new update. For me, this is the first time I have ever used it and I am impressed. Not only can you pick gesture controls but you can also customize them and create as many as you want. A few things I would like them to fix… 1. Make it able to move around and go smaller. 2. Let it stay while you are drawing. Procreate is already extremely easy to use so why have something you have to pull up that takes more time. I will say I won’t be using this feature every day but I can’t wait to see if they update it. Customizing your quick menu makes it unique for every artist.
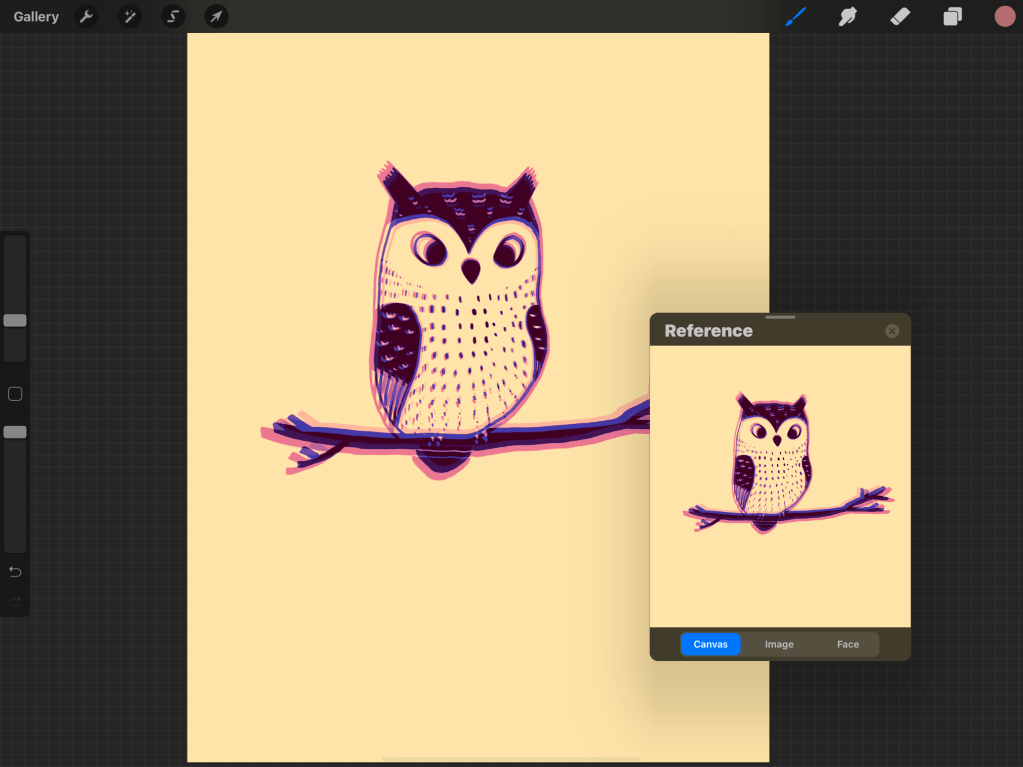
4. Reference
Reference is a new feature that is both helpful and fun to play with. You see it a lot as face paint and proportions but you can also reference an image or your canvas. When you try the canvas option you will notice whatever is on your canvas appears, this is great for making sure that when you are zoomed in, the whole image still looks good. I will be using this as I draw these next few weeks. Referencing a photo just became easier, now instead of it being a layer, you can put it to the side of your canvas. Yay! I’m super excited about this feature. Reference is on actions, canvas, and you just swipe right.
5. Procreate widget
They came out with a widget for Procreate. Just search the app and it brings up widget sizes depending on your preferences. This shows the last thing you have worked on and something you can look at throughout your day.

There are other updates but these five are ones I wanted to talk about. I love Procreate and it is constantly developing and getting better. If you want to support me and my art click on this link to my RedBubble store. If not, please go check out my other posts about art, recipes, and chickens.
