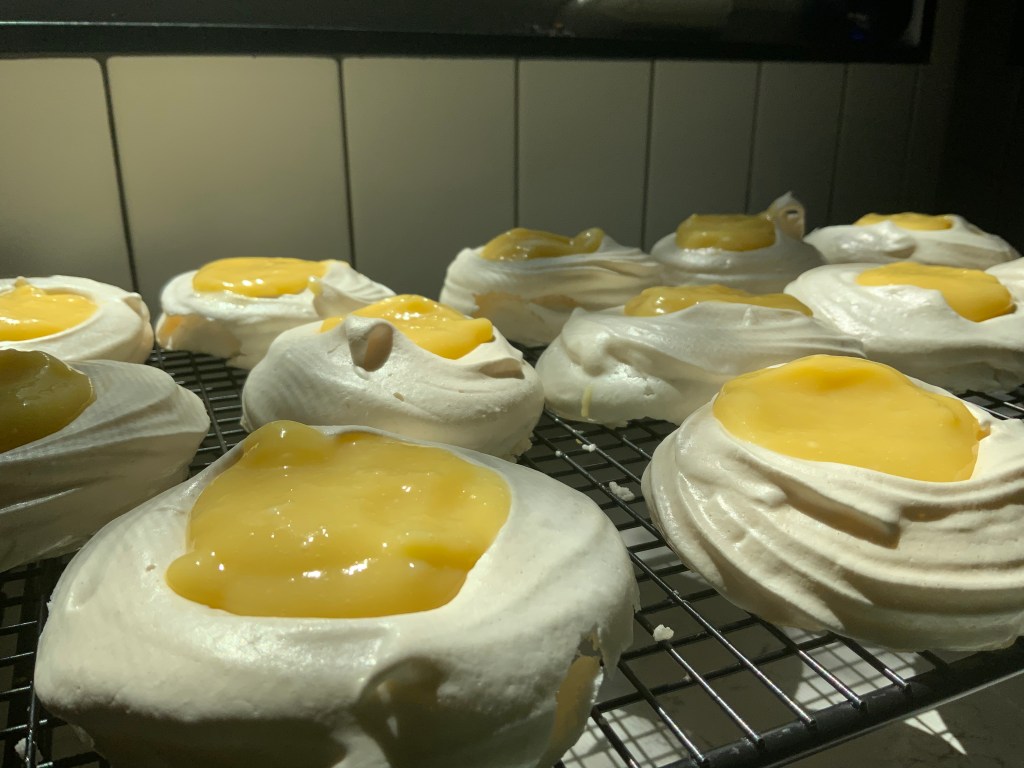
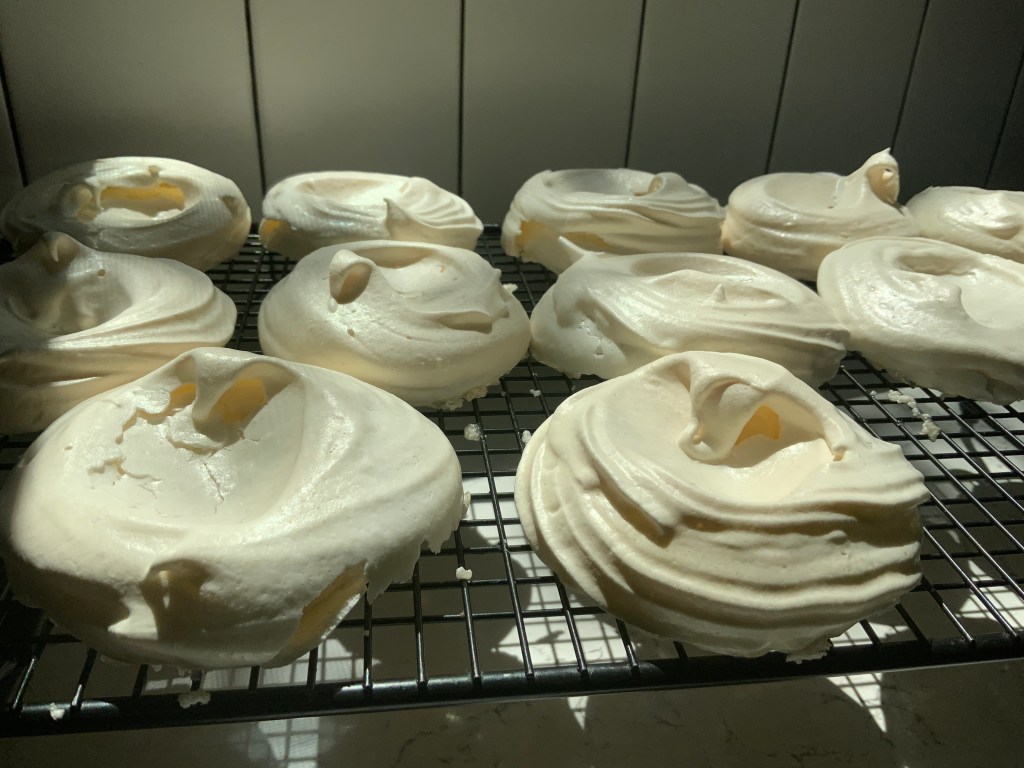
I have never made pavlovas before now. That’s shocking to me because they’re so good and I have tried the dessert multiple times. I stay away from baking meringue because of the amount of sugar it takes to make. Putting that aside, this is a really beautiful dessert. The dessert itself, if you don’t know, is a meringue base with a little indent for whipped cream and berries. I have made meringue before and it’s SO FUN. It is crisp on the outside and marshmallowy on the inside. Not only did I make pavlova for the first time, but I also added some lemon curd, piped whipped cream, and some blueberries. Here is the recipe I used and my thoughts.
Meringue:
6 egg yolks *room temp
1 1/2 c sugar
2 tsp cornstarch
1/2 tbsp lemon juice
1/2 tbsp vanilla extract
2 drops almond extract
2 drops lemon extract
Whipped Cream:
1 1/2 c heavy cream *cold
2 tbsp maple syrup
Lemon Curd:
1/2 c lemon juice
3 eggs
3/4 c sugar
2 tbsp lemon zest
1/4 tsp salt
4 tbsp butter
Fruit:
4-5 c fresh fruit, I used blueberries
Directions:
Pavlovas
Preheat the oven to 225 and make sure everything is set up for each step. Pavlovas require air to make them light, waiting too long means they might be loose to work with. Line a baking tray with parchment and have a spatula ready.
Into the stand mixer beat the 6 egg whites until soft peaks form. Then, not shutting off the mixer, add sugar. I went about 1/3 cup at a time until all of the sugar was used. It should be glossy when you turn off your mixer. You can check this by holding the bowl over your head, that is how stiff it should be. Then fold in the mixture of vanilla and lemon. Impression: I thought folding in two seperate liquids was weird so I mixed them together in a little bowl and then folded them in. This is where I added almond and lemon extract.
Lastly, fold in the cornstarch and fill a piping bag with that mixture. Impression: I like to get a tall cup and put the piping bag inside. Then I fold the opening over the cup and fill the bag. This makes it so I am able to use the whole batch while not getting too messy in the process.
Pipe them on the baking tray by first going around in a circle, building up, and then using the back of a spoon to indent it better. Impression: The first one I did was a bit messy so I made sure to measure the rest 3 inches apart and far away from each other. If you aren’t careful they will expand slightly and merge together in the oven.
Cook for an 1hr and 15 min. Then turn the oven off while keeping the door closed. Impression: Pavlovas are very delicate so that means no just opening the oven door. They are similar to eclairs in that way, so the more time you can let them sit in there the better. This helps them dry and and hold up for the lemon curd. I leave them in for 30 min. and little by little open the door till fully open. Finally, I transfer them to the counter.
I love making my fast recipe of lemon curd. It doesn’t take a bunch of fancy steps and I do that while my pavlovas are baking. They take so long! But this recipe is the opposite.
Lemon Curd
In a pan on medium heat, whisk lemon juice, sugar, and zest.
Add eggs, salt, and butter then stir well till combined.
Whisk constantly to make sure the mixture doesn’t curdle and then remove from heat. It should be thick enough to coat the back of a spoon.
You may strain it if you’d like before letting the curd set in the fridge.
Impression: for this recipe I only used 1/4 c of sugar and it still worked. The purpose was to combat how sweet the meringue was. You can totally use the full amount!
Assembly
First wash your fresh fruit, get out the lemon curd and whipped cream, and seperate the pavlovas so you can assemble them. The whipped cream should go in a piping bag and the lemon curd should be fully set and cold.
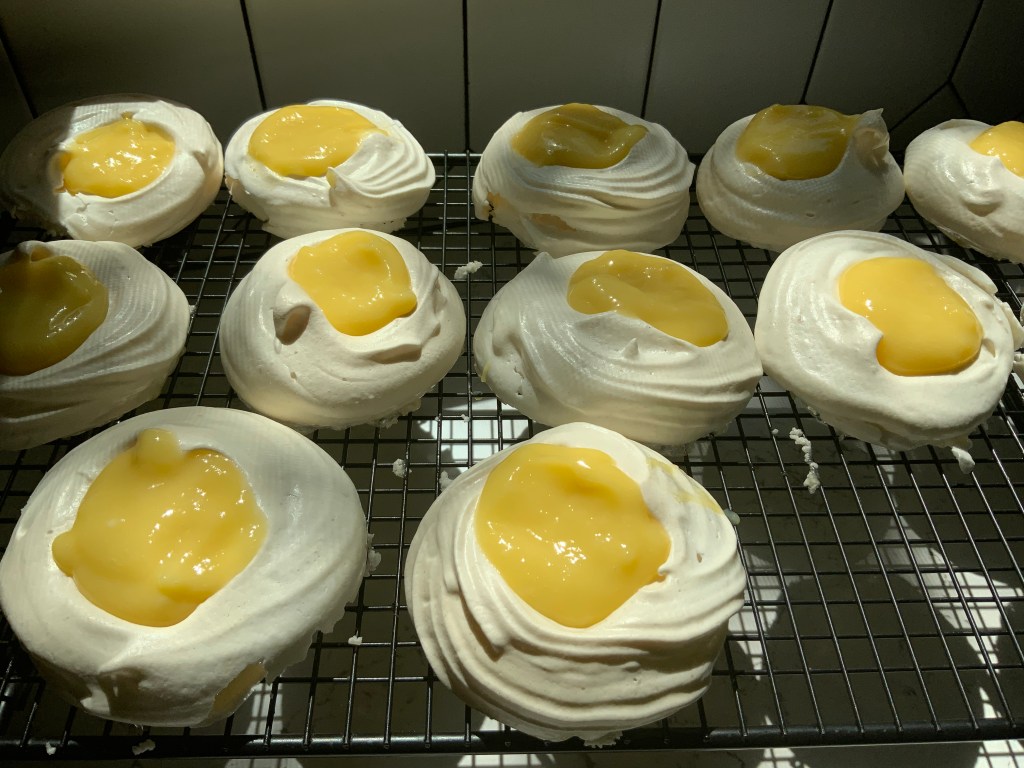
I spread on the lemon curd in that little indent before piping some whipped cream on top to fully cover the lemon curd. Then I added berries and served.
I forgot to take pictures when they were fully done because we all immediately dug in! Impression: the meringue is super sweet so having something as tart as lemon curd makes the dessert more balanced. I love the fresh berries and feel like this is the ultimate dessert for a tart and sweet bite.
The Sephora VIB sale came and went and I didn’t purchase anything. My cart was full but Sephora is extremely expensive! So adding all that incredible product I wanted to buy would have been a fortune. 2021 has produced some amazing products including the products of Rare Beauty from when the brand first launched in September of 2020. There is no denying that although expensive, Sephora has some incredible choices in the way of makeup. My mom was looking for a fresh look to sport on zoom meetings (check out her website here for wellness coaching) and I was looking for some blush and concealer, together we tried and reviewed a few products. So without further ado, here is what we bought.
Rare Beauty Liquid Blush in Bliss
Do you see that color? So beautiful!
This product was one of their first launches and something I have kept my eye on for awhile. At first, I was slightly disappointed with some of their shades because they weren’t really everyday colors which is what I look for. When you see them in person they can be blended out for a sheer effect if that is what you are looking for. The shade I was most excited to try is Bliss because I gravitate to those pinky and peachy shades for my pale skin. Not only was the shade right, the formula was amazing. Trust me, when I saw this I thought it would be similar to Cloud Paint from Glossier but I was happily surprised. As one of their matte shades I expected it to be drying but it blends like a liquid and sets into a powder. Just a warning this is pigmented! I only use two dots on my cheeks and whatever is left for the bridge of my nose. I like to apply it with my hands and blend with a dense brush but however you apply it, it looks beautiful. Overall a 10/10, I will be getting the color Joy next!
Rare Beauty Highlighter in Mesmerize
Look at that shine, it is in competition with the sun!
A liquid highlighter made a lot of sense for Rare Beauty, looking at its other products. And as liquid highlighters have become more popular it’s hard to know which one actually works. This one does not disappoint. I can’t give it a 10/10 on me because of the color but on my mom’s deeper olivish skin it is the perfect color. A mix of highlighting shine and dewy without looking like a streak across her face. The color on me is too dark, casting a bit of a shadow where there shouldn’t be one. I think I will just have to pick up Enlighten and Enchant for my paler skin, keep in mind that you can mix these for your perfect match. This product blended similar to their other products, it’s like a dream. If you need to be out the door in a hurry this highlighter has got your back, and it does not move throughout the day.
Rare Beauty Melting Blush in Nearly Neutral
It looks like a mirror compact, how cute!
The packaging for this product is on point, not only in my favorite color pink but the inside has a mirror and blush inside. I was the most surprised with this product, not only the color but also how it felt on and off the skin. It feels like butter, I am sure that is where the melt part of its name comes from, but still it takes awhile to adjust to the application. The color is so pretty with a light sheerness that I can get on board with. This blush came after the liquid blushes and I am glad they did. For every person there is a color and pigmentation that works for them. If you like more everyday colors and less pigmentation, these are for you. Not only do these shades come in melting blush they also come in liquid eyeshadow and Glossy lip balm (coming up…) for a monochromatic look. I have no cons unless you like colorful blush, but in my opinion this is a must if you haven’t purchased it already.
Rare Beauty Lip Souffle in Courage
Pink, pink, and more…pink?
I have to say I was kind of disappointed with the shades on this product. Although the shade Inspire was so pretty on Selena Gomez it wouldn’t have worked on my skin. I can say the same for most of these shades, which is sad. I am not brave enough for purple lipstick! Again I was really looking for an everyday; pink, mauve, or berry. But all the pinks were too pink and all the berry too berry. So I went with the shade Courage and I have to say I was not happy with it at all. Not only was the shade a miss and a bit blah, the formula was buttery in some places and then came out in globs. I will stick with their other lip products…
Rare Beauty Lip Balm in Empathy
Already well loved 🙂
The shades in this product, however, were amazing. The packaging was very thoughtful and I absolutely loved the flat bottom. Not only is it fun to close, it makes storing the lip balm so much easier. My favorite thing about makeup is accentuating features and I think this product does just that. It is your lips with that little something extra! It takes only a few seconds to put on and the texture is both hydrating and will stay in place. You have a lot of choices when it comes to shades and there is a shade for everyone. I love Empathy and can’t wait to pick up some more! My only downside was as I kept using the product I noticed the strong scent of it and how buttery it was which made it a bit messy.
Rare Beauty Glossy Lip Balm in Nearly Berry
It is the most beautiful shade ever, do you see the gold?
This product just makes sense, and although it pairs with their liquid eyeshadow and melting blush you don’t need all three products. This is by far their best lip product because it is a three in one. A lipstick from color, lip balm for its hydration, and lip gloss for the shine. This is totally a put on and go product. Not only is it super easy, it also wears beautifully throughout the day. Even though a bit of shine might be gone, the color will still remain. The shade is perfect for deeper skin like my mom’s or for lighter skin like mine because it is very light in color for a pretty wash of color. And that concludes all the Rare Beauty products!
Kosas Concealer in 1.0 & 3.5
You need to go get this, ASAP.
As far as concealers go, I haven’t really had a real concealer. My acne prone skin hates foundations or concealer and is very sensitive. That’s why Kosas is such a great brand, it’s clean beauty with the performance of high end makeup. Even though I only got two products from them, I will be buying more because they were the best last minute buys. We didn’t see the Kosas shelf until checkout and I knew I had to get these. One for my mom and one for me. I have heard amazing things about this concealer and let me tell you it lives up to the hype. I got shade 1.0 which is a little light but makes me look awake without creasing and showing fine lines. It has a flexible tip that makes applying easy, and the texture blends equally well with a finger as a beauty blender. It also stays like this all day. I have gotten the most use out of it and found that applying a little in the corner and on the outside of the eye is the perfect amount. It is more medium coverage but buildable. Over acne it covers redness while letting your skin shine through. This gets a 15/10, I am so excited to experiment with it more.
Kosas Eyebrow Gel in Medium Brown
The packaging on this is really cool!
I have not actually used this product because I don’t like tinted eyebrow gel, especially this dark, but I used it on my mom and wow this stuff is way better than the Glossier Boy Brow, in my opinion. It holds like crazy and almost looks like you filled in your brows because it makes them so shaped, full, and fluffy. I didn’t research the product beforehand so it could have gone bad quickly. Why haven’t I heard more about this brow gel? Especially if you have light brows this will make them really show up, I will be purchasing this for myself in clear.
ILIA Mascara in After Midnight
Such clean packaging, looks so cool against the marble.
ILIA is a brand that I hadn’t seen until watching Julia Adams review them. I looked up this brand immediately after watching her video on them! They are really expensive because they say they are clean beauty. After reading some reviews of the brand and looking up their products on EWG, skin deep website I realized that they really aren’t. Endocrine disrupter anyone…Their only product that gets a good rating is this mascara so it’s the only thing from the brand I felt safe trying. I am so glad we got to play because the color is really beautiful and the wand makes applying it so easy, it also stays all day with no flaking. My mom reported no burning tired eyes at the nd of the day. What else could you want? There’s more. It lengthens, defines, and fluffs (is that a word?) and adds volume without the clumps (dare I say like falsies). I really like the mascara overall and will definitely buy one of my own. ILIA needs to come out with some safer and cleaner formulated products because I would like to try more!
Tower 28 Cream Blush in Magic Hour
You can see how creamy the formula is, my fingerprint is still there!
I am actually surprised at the shade range they came out with, even though this looks more pink as a swatch, on my pale cheeks it is a pigmented nude/mauve that I love. I seriously can’t even pick up my Cloud Paints anymore. These blend in so beautifully and the texture is the perfect mix of creamy and set down so it stays on your skin all day. The formula on this is exceptional, I almost love it more than the Honest Beauty blushes which are my go tos. I guess that will have to change! The application is the best part, I just like to have about two dots on each cheek and blending with my fingers or a dense brush.
Tower 28 Milky Lip Jelly in Cashew
That color is gorgeous…
Tower 28 has impressed me so far. I will have to try out some of their other products. My mom picked out, (I may have pointed her to) Coconut, and it was such a good choice. It might not be the most stand out product of the bunch but it is definitely a great option for a glossy, stained lip look. It’s classic and understated. The colors themselves are unique and I like the way they packaged the product as well. The Glossier lip glosses are a good comparison because you will find this one is not sticky at all and the colors are wearable for everyday.
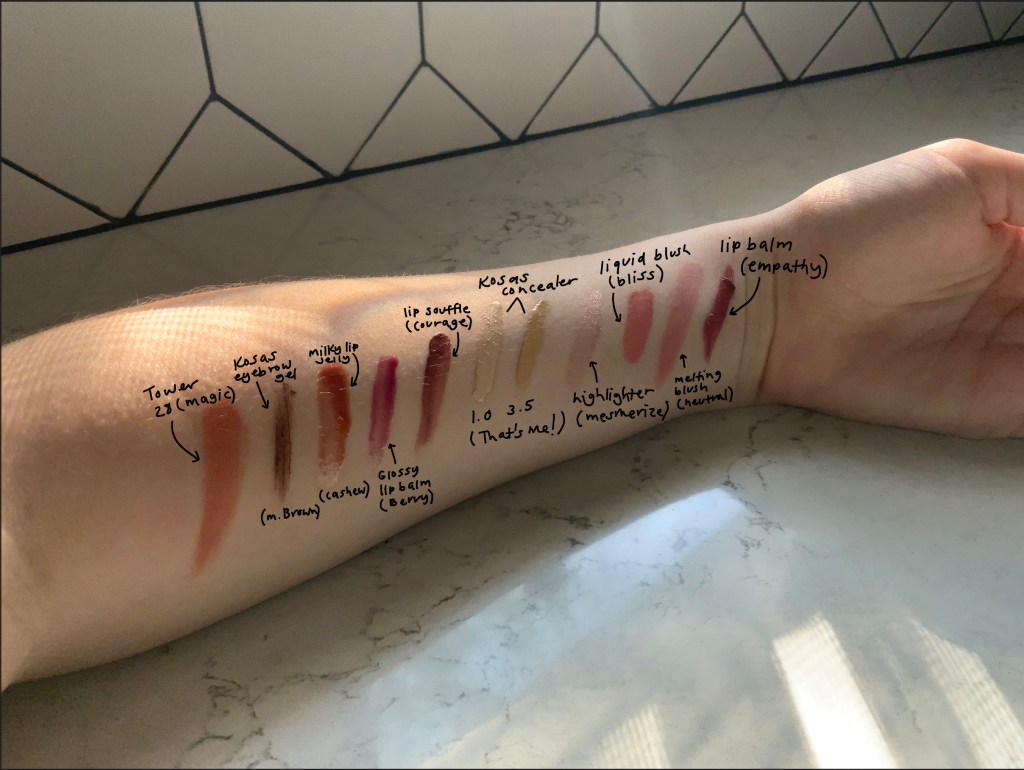
Swatches
Swatches with labels…
I used Procreate to label all the product swatches so you get more of a feel for the colors. I research exhaustively before buying anything so my expectations were very high. The brand I was most looking forward to is Rare Beauty and I was impressed with what they offer. It is inclusive and affordable with products I am sure will get into your makeup rotation. The biggest stand out was the blushes. The Rare Beauty melting and liquid blush and the Tower 28 blush. Although the concealer came in close second. The best lip product was a tie between the Glossy Lip Balm and the Milky Lip Jelly. The only disappointments were the lip souffle and the Rare Beauty Lip Balm, but even so they are still very wearable products. I found a lot of gems and look forward to try more of Ulta and Sephora products in the future. Let me know your experiences and thoughts. Shine on!
Eclairs or cream puffs are amazing and I can’t stress this enough. They require some time and love but once done, you will want to eat them all. The ones pictured above are cream puffs although I make both countless times for my family. They get their name depending on their shape, either cream puff or eclair. Both French pastry filled with pastry cream and topped with chocolate ganache.
Although there are about a billion recipes out there, some are better than others. In my opinion, no one does eclairs like the French so I would turn to a French cookbook, my favorite being The Art of French Pastry. Not only do the recipes make for some awesome desserts but the instructions themselves are so well done. Anyways, for this recipe it is taking it super simple and delicious. It will become your new favorite dessert!
Pastry:
¾ c water
¾ c flour
6 tbsp butter, cut in cubes
¼ tsp salt
1 tbsp sugar
4 Eggs, room temp
½ tbsp vanilla extract
Chocolate Ganache:
2 ounces semi sweet chocolate, chopped
3 tbsp heavy cream
¼ tsp salt
Pastry Cream:
1 ½ c milk/heavy cream
¼ c sugar
4 egg yolks
¼ c cornstarch
1 tbsp vanilla extract
Directions:
Note: Make the cream first to let it rest while you make the pastry part. I normally make the cream in the morning or even overnight so that it will be completely cooled and set when I’m ready to assemble the eclairs. I also recommend a double recipe of the pastry cream for more filled cream puffs.
Pastry Cream:
To make the pastry cream start by heating the milk and cream mixture in a pan on medium. I do half milk and half heavy cream but it’s really up to how thick you want it.
In a separate bowl mix together the egg yolks, cornstarch, and sugar until combined.
Test the cream mixture with your finger. It should be warm, not boiling!
Slowly add the cream mixture into your eggs and then put the whole thing back into the pan. This should be slow so that the eggs don’t curdle. *Eggs should be room temperature to start with.
Stir with a whisk and make sure the bottom doesn’t have build up. It’s important that you watch this, I can’t count the amount of times I have accidentally curdled pastry cream.
Once it starts to thicken don’t take it off the heat immediately. Stir harder than ever so the pastry cream gets to its full potential.
Take it off the heat and add vanilla, you don’t want to add it in early because otherwise the delicious vanilla flavor can’t be tasted.
All of that goes into a bowl and in the fridge to set. Make sure to put saran wrap over it. It should touch the pastry cream’s top to avoid a weird skin.
Eclairs/Cream Puffs:
Preheat your oven to 425
Start by heating a pan on medium heat. Add butter and salt, then melt.
Pour in your water and wait till it comes to a full boil.
Take it off the heat after quickly adding your flour, make sure you stir right away. Once it is combined…
You can either put this mixture in a stand mixer immediately or wait to add in the eggs to the pan itself once it is slightly cooler.
I add this mixture to a stand mixer and turn on low speed to cool it down. This also gives it more of a mix.
Then one by one add in your eggs. Cracking them beforehand is a great way to ensure you don’t have any shell in your eclairs.
It should be combined before you scrape down the sides and put it into a piping bag.
The mixture should be easy to put in the piping bag without being too runny. Adjust the recipe as needed depending on the size of your eggs.
Once you have a pan prepped with either spray or parchment paper you get to decide what shape you want to make. They both puff up in the oven so try to spread them apart and make them smaller than the size you actually want.
I tend to go cream puff because they are easier to fill and eat. I pipe small circles and pop them in the oven for 5 minutes. Without taking them out, I decrease the temperature to 350 and leave them in there for another 30 minutes.
Once I see they are golden, I shut off the oven and open the door slightly. Over the span of 30 minutes I open the door more and more until it is all the way open. I do this to make sure they keep their shape so whatever you do, don’t open the oven during the cooking process.
Once they are cool I set them on a baking rack. I get out my pastry cream, stir and put in a piping bag.
I fill all of them and then make the chocolate ganache. After topping them you can either eat them right away or let the chocolate set. Either way, Enjoy!
I don’t have any posts about skincare or makeup on my website right now, but I am obsessed with both. Having clear skin is made up of several factors like genetics, health, and the products you are using. It’s not as simple as just washing your face. I am writing an opinion piece about the brand Glossier that I will put on my website as soon as it’s done 🙂 Anyways here is my complete review of the brand The Ordinary.
What is it?
When researching about skincare and what makes a good routine I stumbled upon The Ordinary. It is a brand that focuses on formulation of products instead of their packaging. The brand that owns The Ordinary is DECIEM, and this company is different then what I usually see. They make it a priority to make skincare affordable. I bought nine products from this brand, and am so excited to try them. I want these products to reduce scarring, hyperpigmentation, acne, and texture. Skin is not all the same so it’s extremely hard to recommend what really works. But if you have combination skin, acne, and years of scarring I will give you a jumping off point for your own skin. Here are my thoughts.
Routine
I started a skincare routine at age 13 and since then I have rethought each of the products I use. In every routine there are three main things: Cleanser, Moisturizer, and sunscreen. This is just a base for your routine not the only things there are. For those just starting I would recommend these three things to better understand your skin. I would also research brands, ingredients, steps, price, this all plays a role. When researching this brand, I realized how important the steps are in a routine. These products can be dangerous so using them correctly is a must. The only hard part is the names. Compared to Glossier, this brand is hardly user friendly. But if you put in the work of figuring out the products, you will find some great results. I have used these for 4 weeks now and can say that these products do work. They leave my skin feeling healthy, dewy, and reduced swelling. My skin has never looked better.
Extra Products
They have a cleanser but I wasn’t impressed with the consistency I saw in videos, reviews, or by internet digging. It was more for drier skin, as the cleanser was like a balm. I’ve seen these for melting makeup and in some cleansers but decided against it. I just couldn’t see myself benefiting from anything other than CeraVe, which had been in my Ulta cart for a few months. You can buy The Ordinary on Ulta, Sephora, or their website. The second thing I looked into was their foundation, a few steps ahead of skincare. But I had heard great things about this product and $6 foundation is worth it. I really like this, but because I bought online, the shade match was a little yellow. I still like the way it set down into a not too shiny, not too matte middle ground that felt like my skin. Medium coverage, I will definitely have to get this in the right shade.
Onto Masks
Then there is the peeling solution I have been hearing so much about. The AHA 30% + BHA 2% Peeling Solution is a little intimidating but if you know how to use it it will be a game changer for your skin. It is dangerous and has caused red pigmentation so make sure you have watched videos and done a patch test the day before. The ingredients are powerful so the first time I used it I left it on for 8 minutes. The second time 9 and the third time 10. But no more than 10 and once a week. It smelled very strong to me and looks a little like blood. Although like all their products, it was not irritating and easy to work onto my skin. This was one of my favorites because of how it reduced inflammation immediately after use. The second mask I tried was the Salicylic Acid 2% Masque, because I didn’t get the cleanser with the same ingredient. This ingredient, Salicylic Acid, is great for acne and I was super pleased with the mask itself. I know I will use it up quick! It is black and dries down like a clay mask. It feels super light and impossible not to use again.
Serums
Three serums and a mask
They have a lot of products! Even if you have the same skin as me, there are other things I could have tried from the brand. But my skincare routine doesn’t need to be more complicated than it already is. Before serums let’s talk moisturizer. Their Natural Moisturizing Factors + HA is a great product. I think this one of my favorites along with the peeling solution. It comes larger which is good because I know I will use it everyday. It is unscented, yay! The texture is soft, but still is thick enough to hydrate the skin. I find most moisturizers too thin or too thick, this is perfect for me. It literally makes my skin glow, I mean what more can you ask for?
The Azelaic Acid Suspension is known for helping scarring and acne while being non irritating. My hopes were high, and I didn’t feel disappointed. I’m not sure what helped my skin so much, but I owe part of my thanks to this. It smells pretty weird and is very small, but that didn’t stop it from working. The texture isn’t like moisturizer which I was expecting and the product smells a little like clay. But that being said, sometimes products achieve results without smelling good or feeling hydrating.
As an exfoliator, I was going to buy the Glycolic Acid 7% Toning Solution. I didn’t after hearing how strong it is, but wonder if I should have just gone for it. What worried me is that my skin is sensitive, an acid this strong scared me off slightly. Instead I went for the Lactic Acid 10% + HA 2%. The color threw me off, it is actually pinkish coral not yellow like it shows up in some photos. I use it two times a week or three just depending on my skin that week. I could have clear skin one day and then when I wake up I have three breakouts, so it really is a week by week. I don’t use this everyday because it still is strong. In contrast, it feels watery compared to the other serums. You can really feel it soak into the skin.
Next two are their Hyaluronic Acid 2% + B5 and Niacinamide 10% + Zinc 1%. Both have normal enough ingredients that you can find in other skincare. But that I think are vital for my routine. Especially the Niacinamide 10% + Zinc 1% from the Ordinary is the best on the market. The Hyaluronic Acid is thicker and I always dampen my face before using it whereas the Niacinamide doesn’t need prep. Just washing your face with cleanser and then patting dry.
All Products
My Morning/ Nighttime Routine
Morning Skincare
CeraVe cleanser
Niacinamide 10% + Zinc 1%
Azelaic Acid Suspension
Hyaluronic Acid 2% + B5
Moisturizing Factors + HA
Nighttime Skincare
CeraVe cleanser
Niacinamide 10% + Zinc 1%
Lactic Acid 10% + HA 2%
Hyaluronic Acid 2% + B5
Azelaic Acid Suspension
Moisturizing Factors + HA
Every Week or Two
AHA 30% + BHA 2% Peeling Solution- I use this every week to two weeks, it’s really your preference but not twice a week. This stuff is strong so be careful. Wash your face only with a gentle cleanser, a little goes a long way, and avoid the eyes.
Salicylic Acid 2% Masque- I use this every few weeks, it isn’t a product that I would use every week because of the amount of product and the price. When I use it I don’t use the peeling solution and vice versa.
Pizza is my favorite food because it can be anything you want from dessert pizza to pepperoni pizza. The flavors and combinations are endless. However, instead of buying a frozen crust at a grocery store, you can make the dough yourself. Doughs are always super intimidating but this dough only requires a few ingredients.
Ingredients:
306 g flour
2 g instant yeast
2 g salt
202 g water
4 g olive oil
pinch of sugar
I recommend using a scale and not converting this to cups. Grams are more precise and I always notice a difference in my dough when I use these measurements. I have tried 4-5 pizza dough recipes and kept coming back to this one. It only requires time and delicious toppings.
Directions:
Heat the water in a pan until warm, test with your fingers. Pour the water into a small bowl along with yeast, a pinch of sugar, and olive oil. Stir lightly and set to the side.
In a separate bowl combine flour and salt. Create a well in the center for your yeast mixture to go. Give the yeast 5 minutes to bubble then add the mixture to the center of the dry ingredients.
Combine for about 3 minutes with a fork or spoon, don’t knead yet.
Set this aside for 15 minutes while you flour the counter.
Knead the dough on the counter for 5-10 minutes until you touch it and it springs back.
Separate into two balls and cover with Saran wrap. Leave a little room for it to grow in size and place in the fridge overnight- try to leave it at least 12-24 hours.
Remove from the fridge at least 3o minutes before baking so that it gets to room temperature.
Heat the oven to 425 (or the highest it will go) with the surface you will be cooking the pizza on. A pizza stone, slab, something that can withstand high heat. You can cook the pizza however you would like. I cook the crust for 2-3 minutes and then add the toppings. Cooking it until golden brown. You can add a little olive oil for color.
From Experience
For flour I recommend using bread flour or all-purpose flour, bread flour always turns out better for me but all-purpose flour is a great option as well. The water for the yeast should be warm. Not hot, not cold, neutral. If your water doesn’t need to be heated up then skip that step. Yeast likes sugar but not salt so I always sprinkle some sugar in my yeast mixture to help it along. Yes even in pizza. I have skipped this step before because we rarely have sugar in the pantry, but the yeast is happier with it. Make sure the salt is mixed into the flour well, and you can always use more or less salt than what I use. There are only a few ingredients that most people have already so preparation should be minimal. I like to do this the night before, it makes those 12 hours go by fast, then you can eat it for lunch! The texture of the dough should be sticky, so make sure you flour your fingers and the dough before putting it in the fridge. When you pull it out flour it again, there should be a lot of tiny bubbles where there is yeast production.
Cooking
I don’t have a pizza oven but I have made this recipe in one before and it makes such a big difference, pizza ovens get so hot that the crust has some beautiful bubbles and dark pieces. Yum! As for cooking in an oven, you want to get a similar experience so make sure it is the highest it can possibly go and the surface you are cooking it on should be the same. That way the bottom isn’t soggy. I use a pan with holes to better cook the pizza, but pizza stones are great because they get so hot. Toppings are another thing. Tomato sauce is an obvious choice for a pizza but can also provide unwanted juice. Pick something closer to a paste or whole tomatoes and I promise it will make it better. An alternative is ricotta for a white pizza. I like to make an olive oil rub for my pizzas because it infuses flavor into an otherwise plain crust. It’s just olive oil, salt, pepper, Italian seasoning, and garlic. But you can make this your own. Just have fun with it and enjoy!
If you don’t know what Procreate is, it is an amazing app for artists. It doesn’t matter if you are self-taught or naturally gifted. The app is the best there is, in my opinion, and if you like drawing with your Apple Pencil this is for you. I prefer a big iPad that I can see everything on while I’m drawing but it’s up to you. If you are drawing on Adobe Illustrator, please switch to this app instead, it will make your life thousands of times easier. I know because that’s what I was using. Procreate not only makes your art experience better it also can be used like photoshop- kind of- effects and distortion are amazing as well as color and saturation. I use it not only for art but as a tool for school including posters and infographics. I also illustrated Trichy Tillie on it. The newest update has a few new features you should know about and along the way, I will show you pictures to help.
Effects
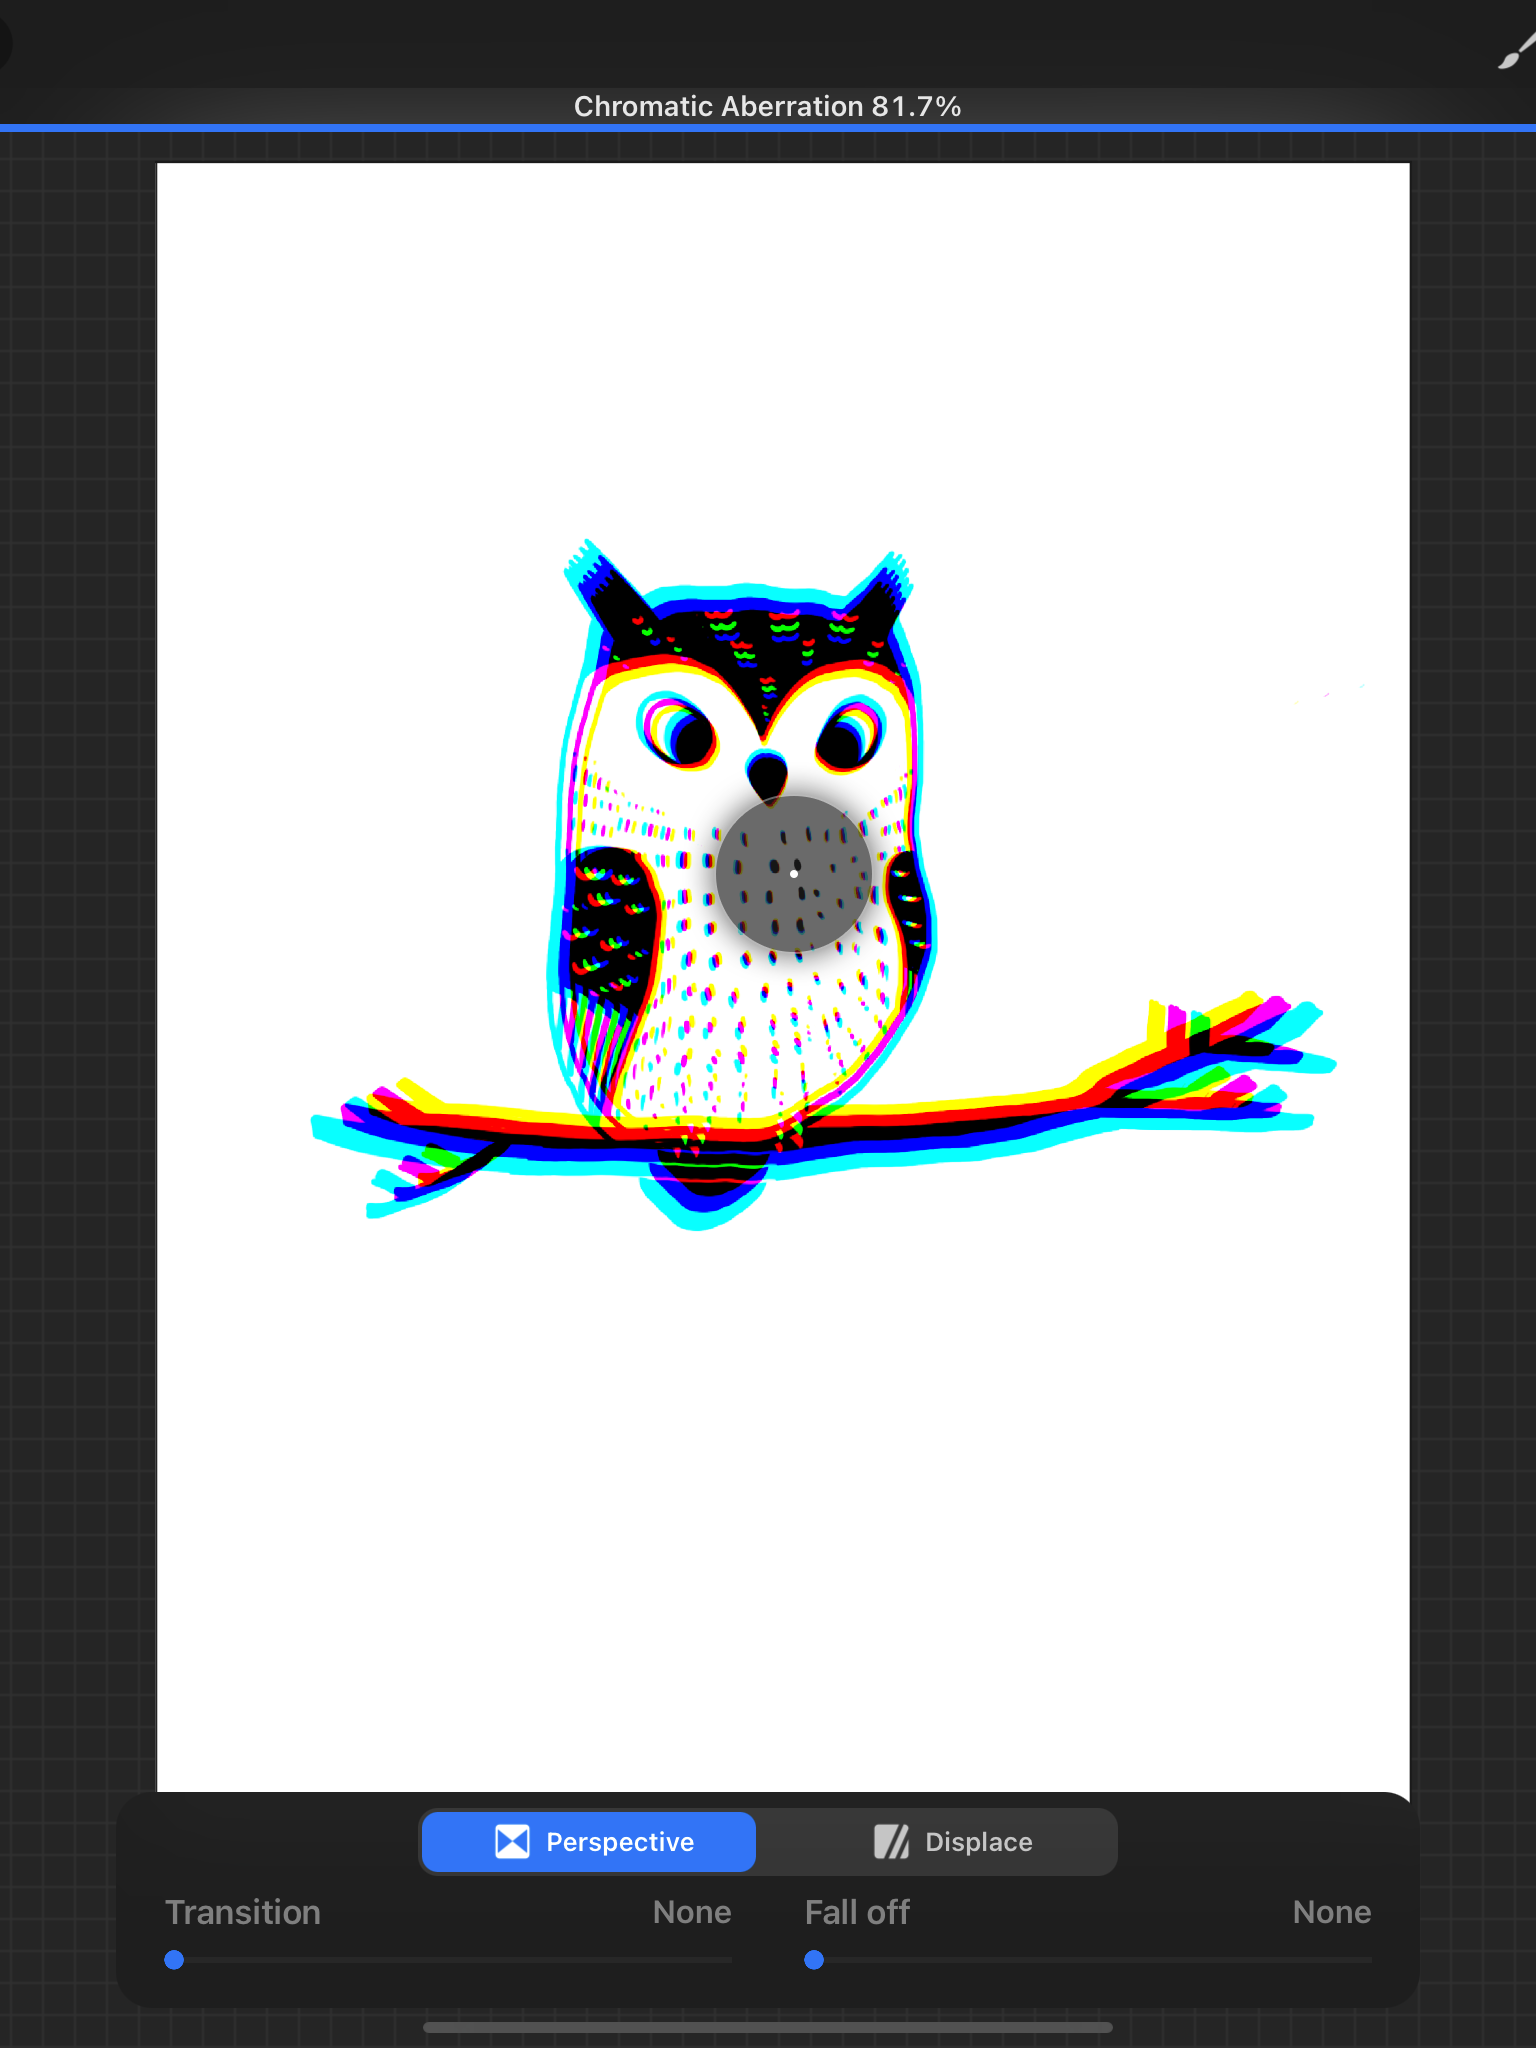
The first one is so cool. I’m not sure if it’s new or just updated but it’s called chromatic aberration. You can use it in displace or in perspective, they both use a chrome effect. Displace: duplicates and slides over your pre-image into the space already created, like an alpha lock. Perspective: moves outside of that space and duplicates the outline of the image. Either way, this gives your artwork some dimension.
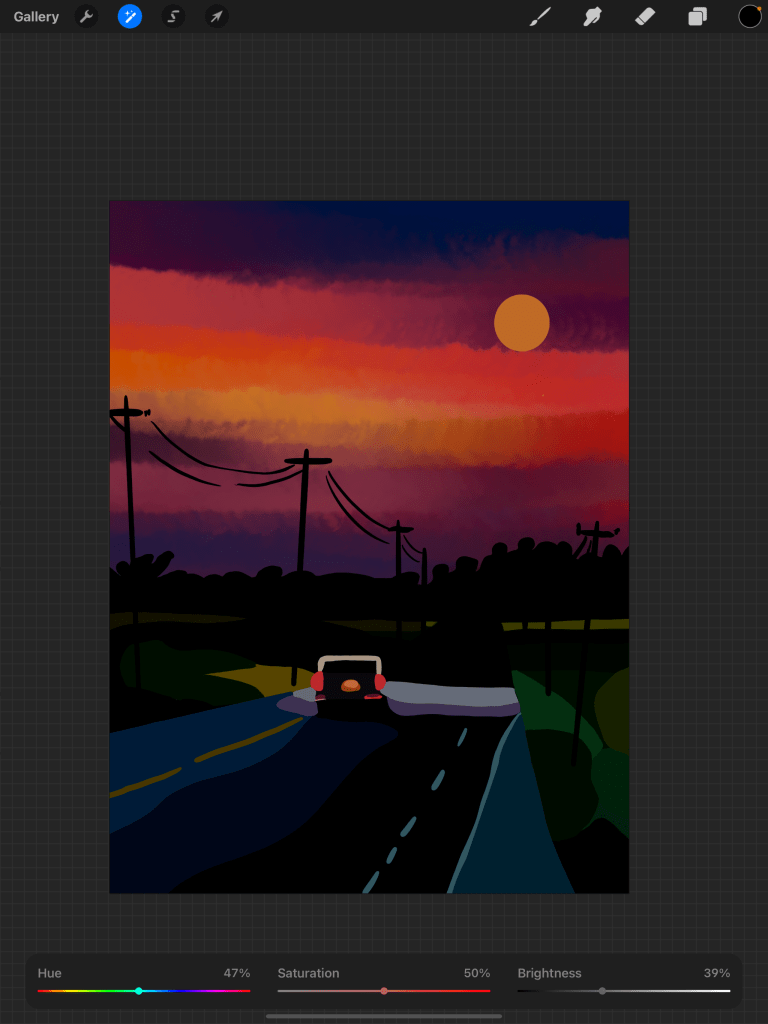
Second is hue, saturation, and brightness
With the brightness turned down it makes the sky darker
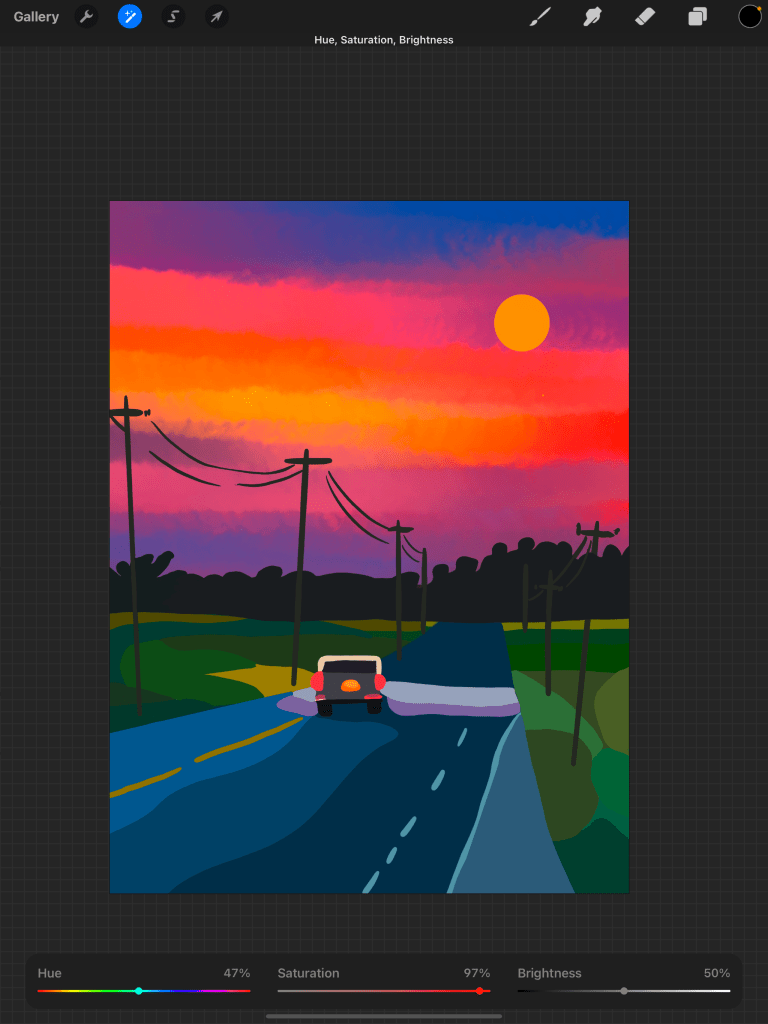
Saturation makes the sunset look brighter
This will save you from having to edit photos. Allowing you to adjust brightness, saturation, and hue just like in the title. But this goes beyond just that. Hue is responsible for completely changing the colors. In the examples, I mostly focus on the sky, effects that are specific for this image because it’s like the car is driving at night.
Here it’s still focused on the sky, but instead of the saturation turning up the brightness, I used saturation to make the sky seem brighter through the middle.
You don’t have to completely change the image, if you work on one layer the effect will be focused on just that. This helps the drawing look more realistic and less edited.
Next is Gradient map, like filters
Mocha filter
Instant filter
Venice filter
You can choose from already made filters or you can make your own. This takes your art up a notch by changing the color, again not making it look fake or edited.
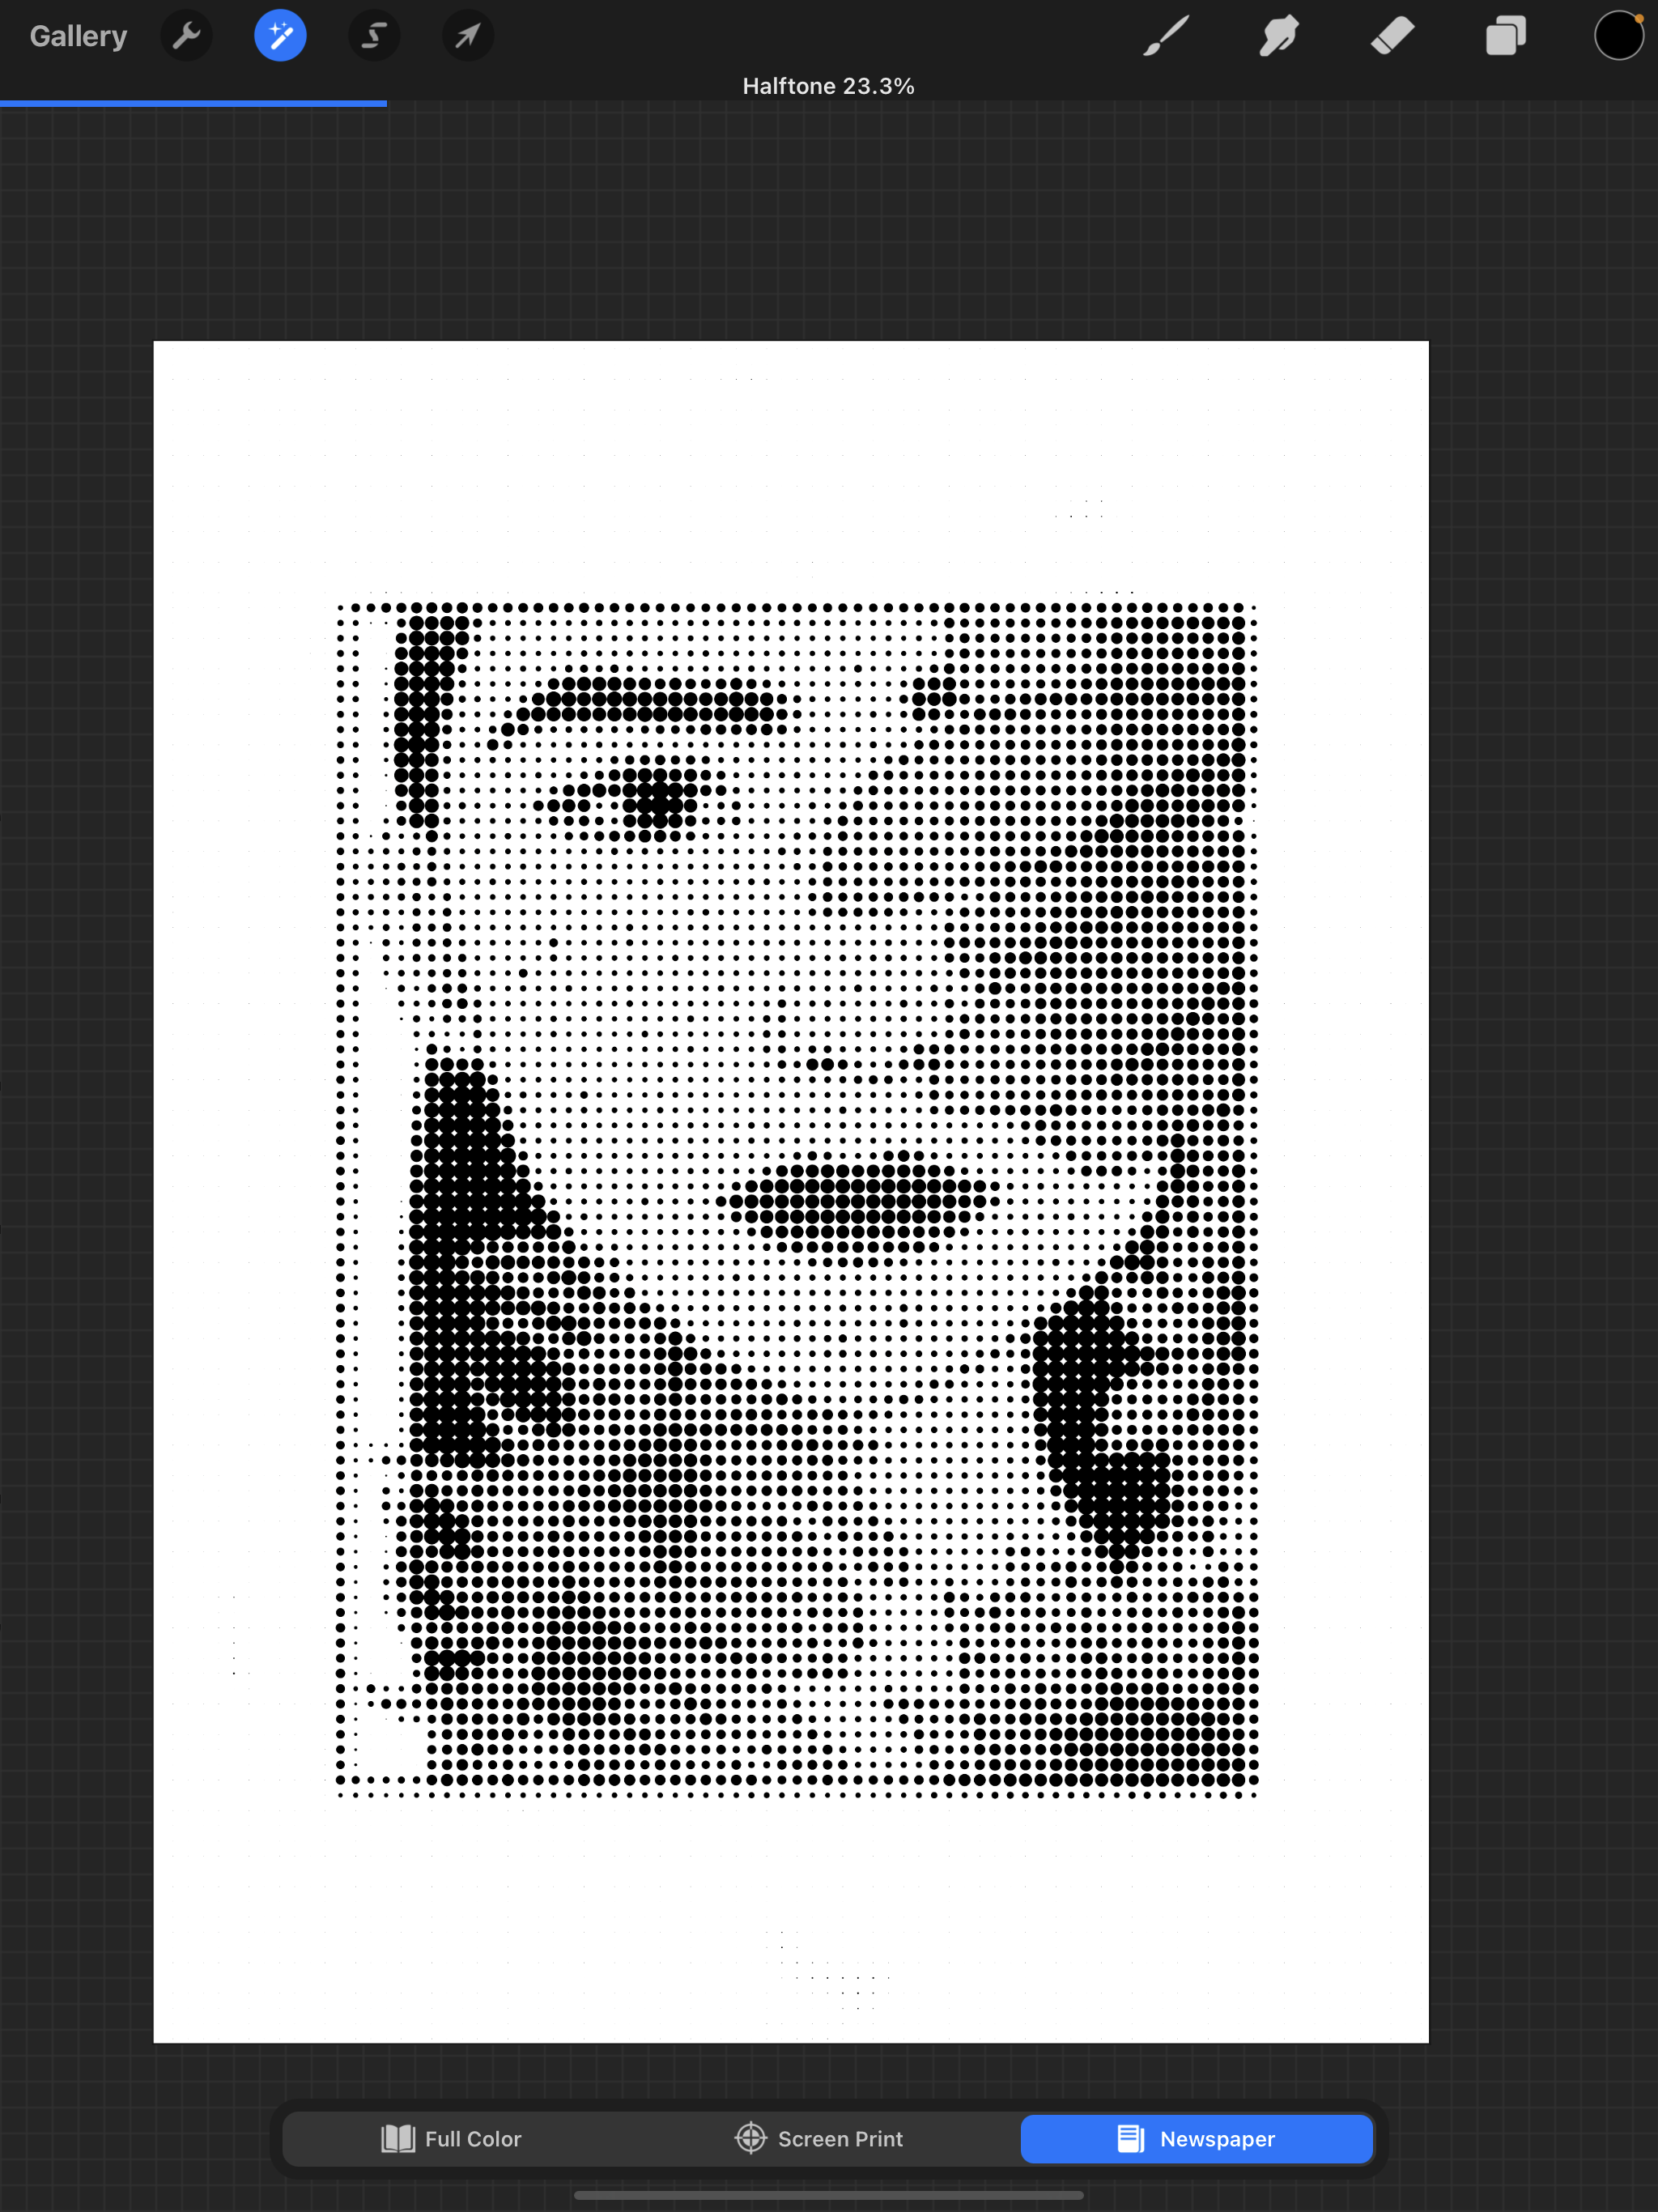
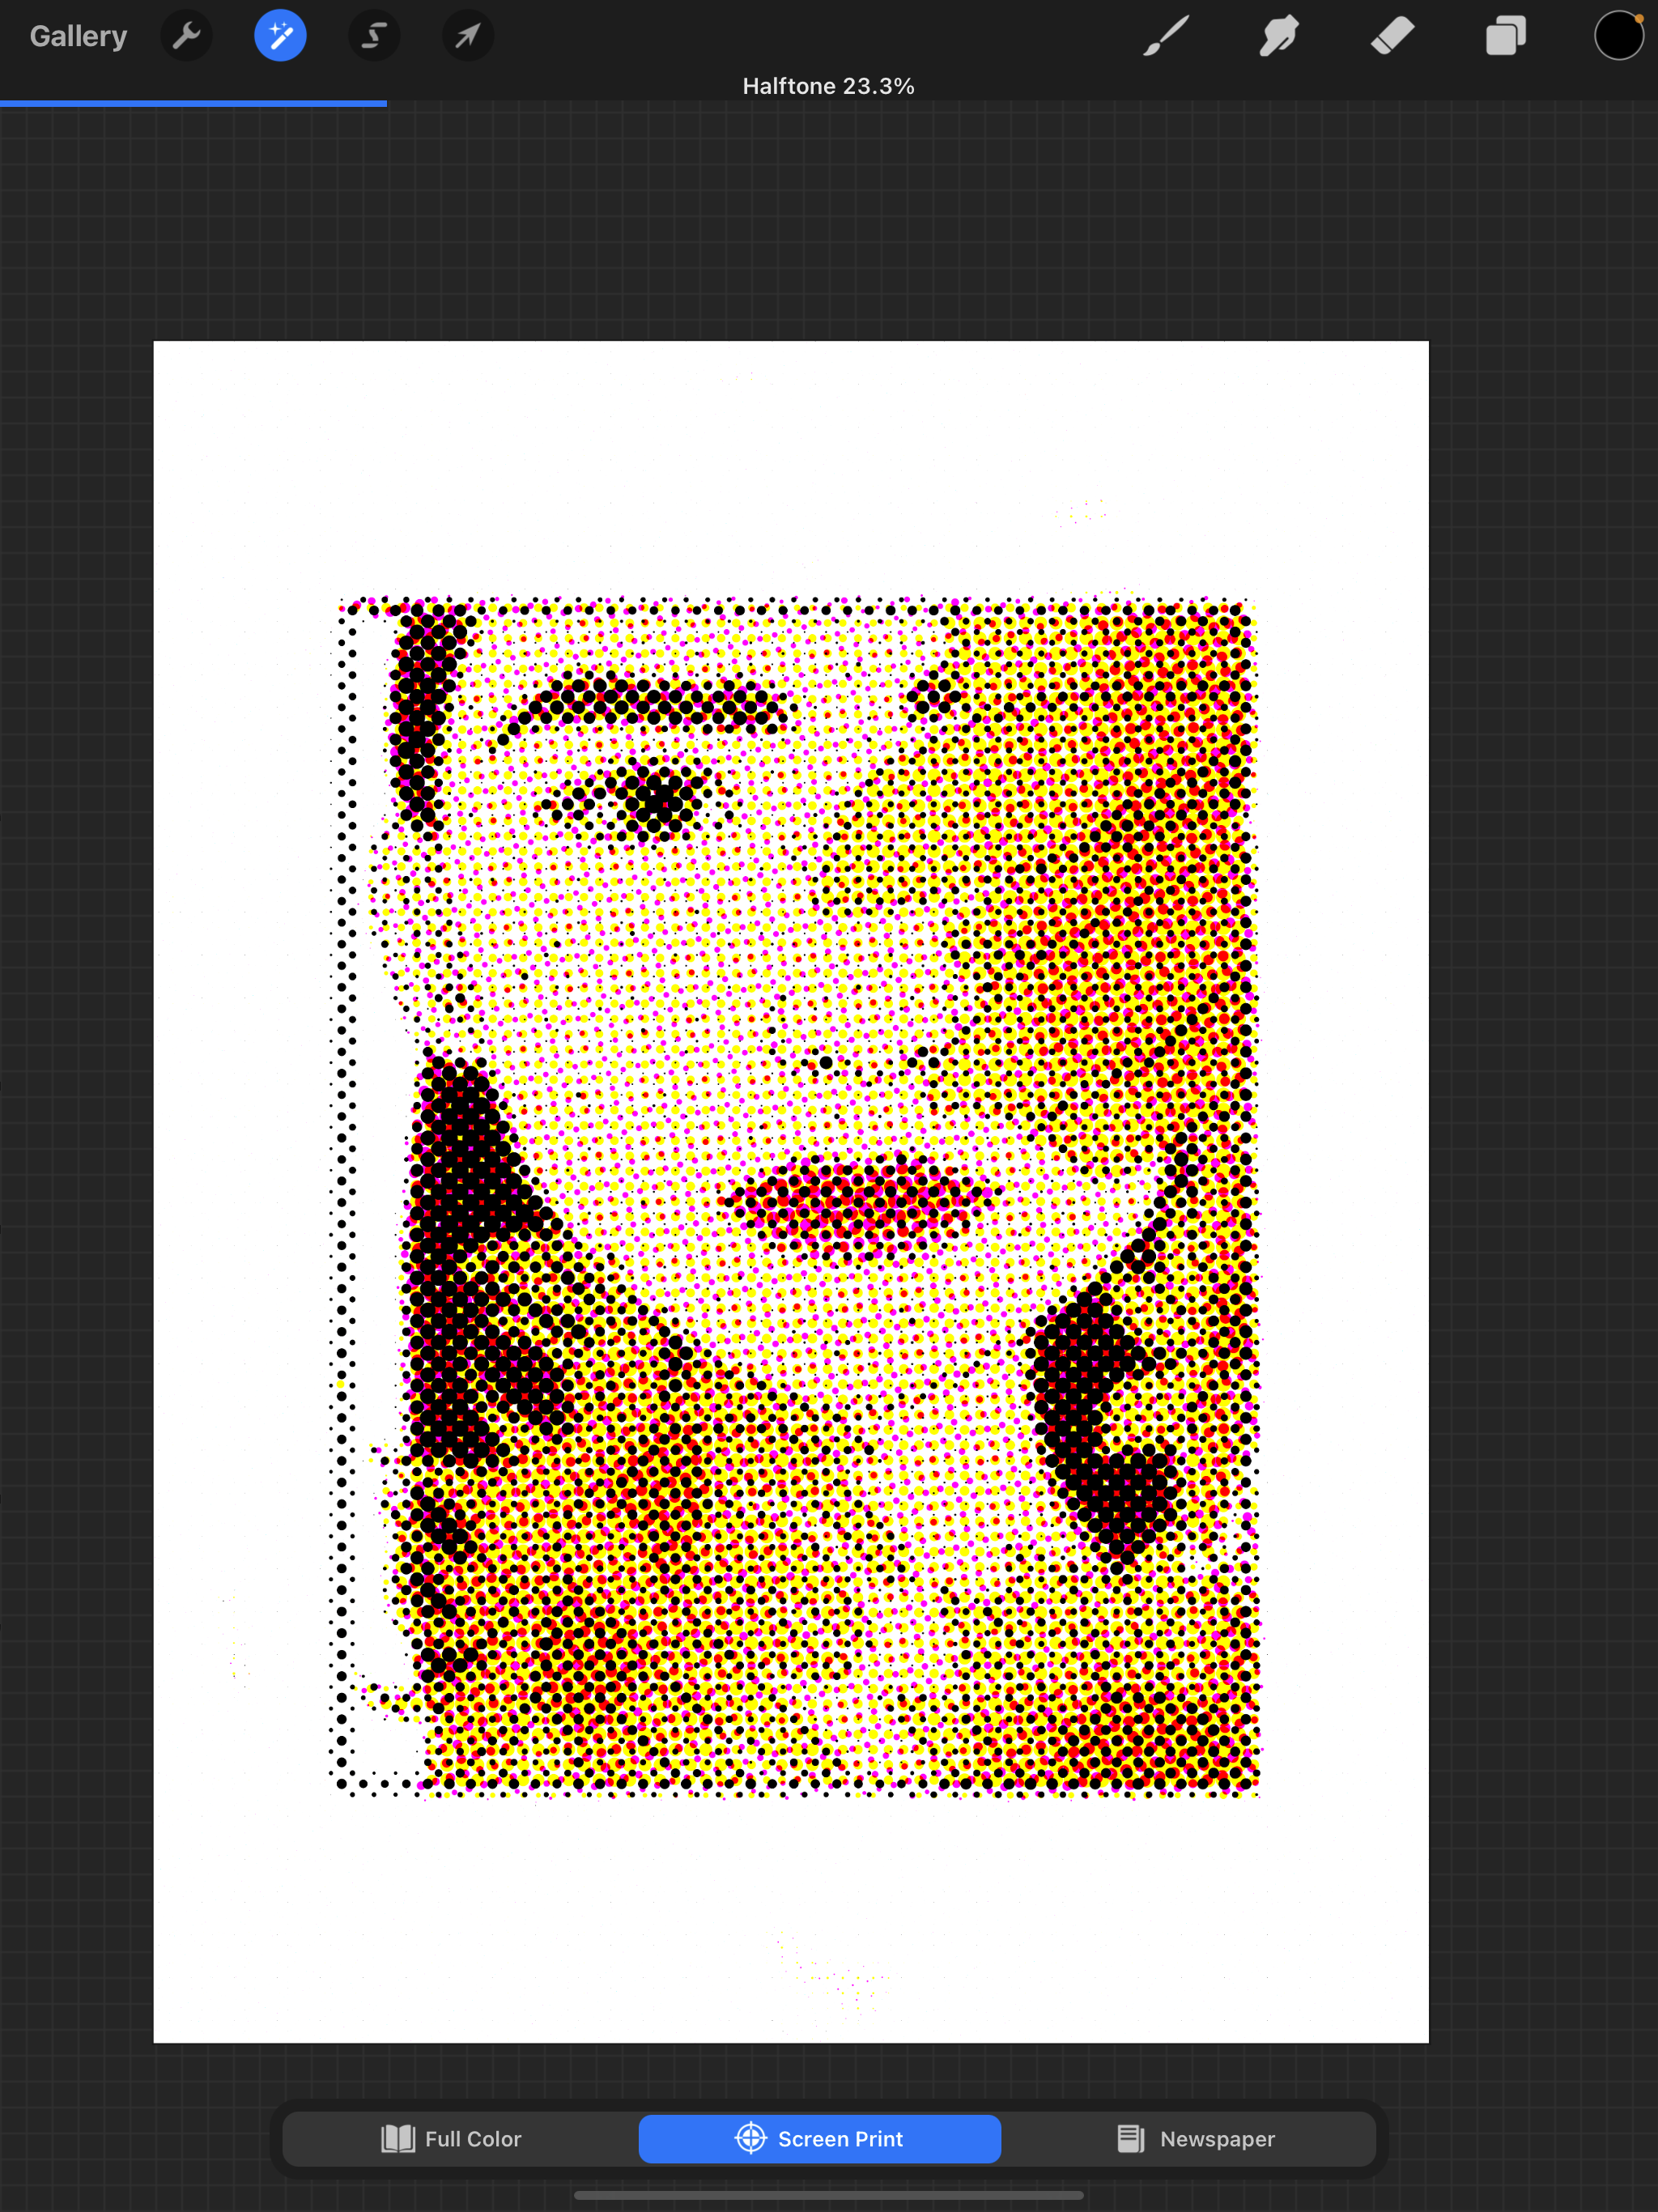
The last one is halftone, my personal favorite
You can adjust how it affects the image/drawing. My favorite thing to use this filter for is for people and portraits. Newspaper is like a black and white filter and the other two are screen print and full color.
2. Private layers
Time-lapse is something you can show others when your artwork is done but what if you took notes or traced and you want a private layer that doesn’t show up? Private layers are something new that you can take advantage of. Private files and photos are two options. But what I want to see them create is just a private layer without anything else inside of it. To make a private layer go to insert a photo and swipe left.
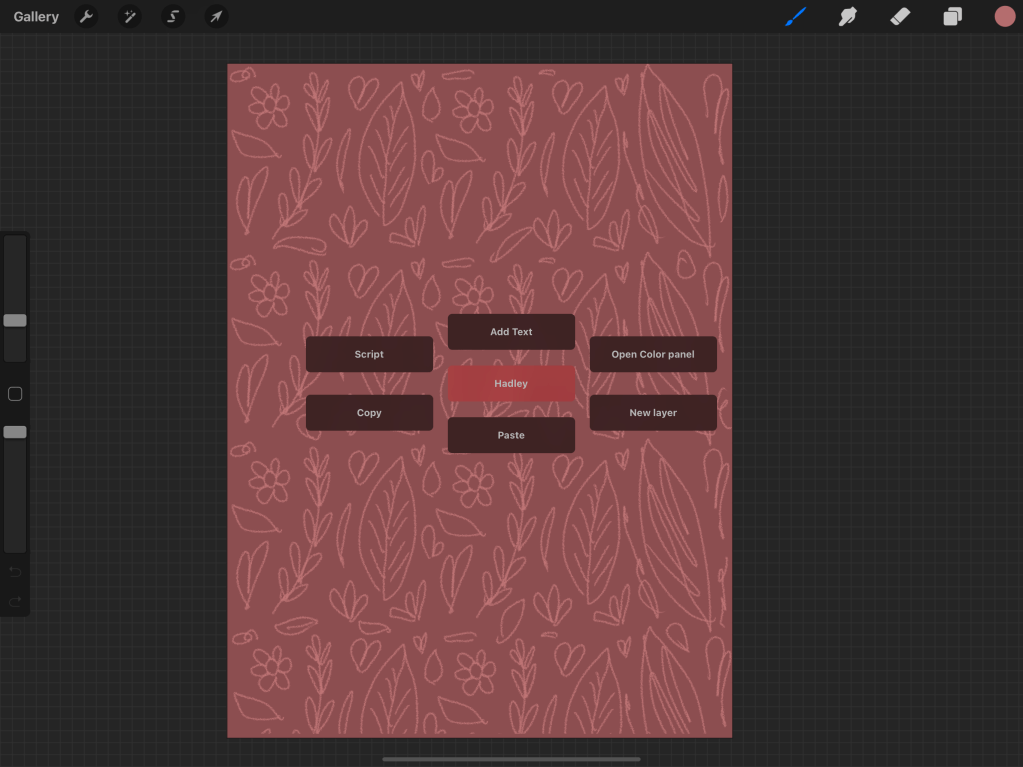
3. Quick Menu
If you are already a fan of Quick Menu then you will like this new update. For me, this is the first time I have ever used it and I am impressed. Not only can you pick gesture controls but you can also customize them and create as many as you want. A few things I would like them to fix… 1. Make it able to move around and go smaller. 2. Let it stay while you are drawing. Procreate is already extremely easy to use so why have something you have to pull up that takes more time. I will say I won’t be using this feature every day but I can’t wait to see if they update it. Customizing your quick menu makes it unique for every artist.
Actions, preferences, gesture controls, quick menu
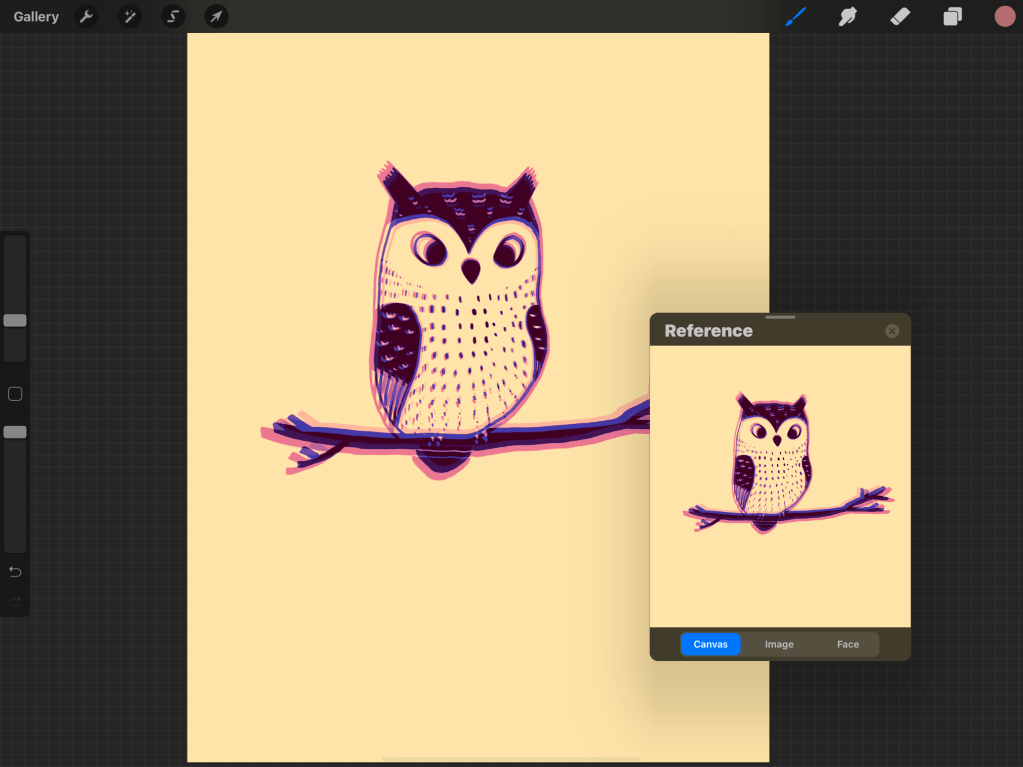
4. Reference
Reference is a new feature that is both helpful and fun to play with. You see it a lot as face paint and proportions but you can also reference an image or your canvas. When you try the canvas option you will notice whatever is on your canvas appears, this is great for making sure that when you are zoomed in, the whole image still looks good. I will be using this as I draw these next few weeks. Referencing a photo just became easier, now instead of it being a layer, you can put it to the side of your canvas. Yay! I’m super excited about this feature. Reference is on actions, canvas, and you just swipe right.
Using canvas reference
5. Procreate widget
They came out with a widget for Procreate. Just search the app and it brings up widget sizes depending on your preferences. This shows the last thing you have worked on and something you can look at throughout your day.
There are other updates but these five are ones I wanted to talk about. I love Procreate and it is constantly developing and getting better. If you want to support me and my art click on this link to my RedBubble store. If not, please go check out my other posts about art, recipes, and chickens.
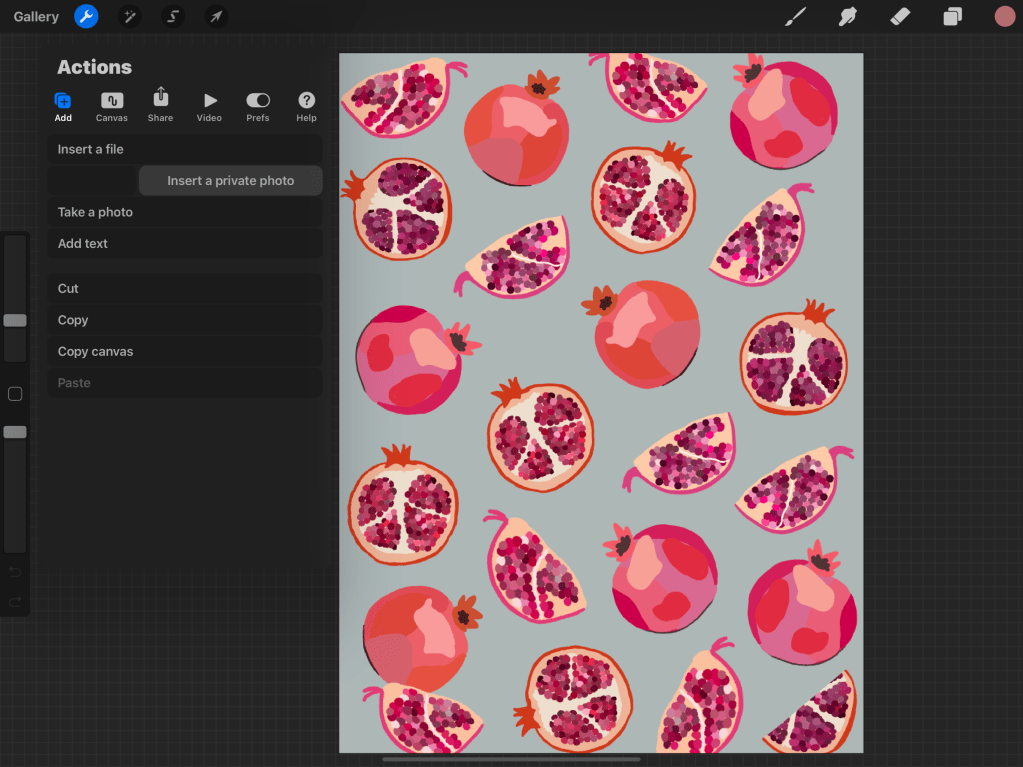
I am excited/nervous to announce that my RedBubble shop is finally open. You can buy products with my art on them from stickers to mugs, also check out and support other artists. I have shared some of my art on this website but with the link below you can purchase gifts for others or yourself. I mostly do prints, florals, and fruit like the ones below. These are a few examples of things you will find…
I have been wanting to start an account for a while and feel that this platform has great quality and a range of products for the consumer and the artists. Artists have control over how a product looks and what they want for their store. I love looking at what others create and feel a bit nervous putting my work out there. I am self-taught and enjoy illustrating in my free time, before doing Trichy Tillie I never thought this could be anything besides something that was fun for me. I got a lot of support and finally got up the courage to do this. If it fails it fails but I hope you and the next customer find something that speaks to them. Happy shopping!
This title doesn’t give much away but I will be writing about my opinions on baking would you rather, I will be using questions from the internet and you can play along!
1. Beat eggs or separate them
I would rather separate, I hate whisking for longer than a few minutes and prefer using a machine, I know some people feel the same way. My ice cream recipe has 6 eggs you have to separate and I don’t mind it, plus I get to see how my chicken’s yolks look.
2. Cookies or cake
This one is hard, especially because cookies are so small. I think I would rather cake, only because I make it more. Ice cream sandwiches would make this question a lot harder. I mean come on, two desserts in one!
3. Overcooked or undercooked
If you bake a lot there have been times where you have done both of these. I tend to overcook my desserts instead of under but there have been a few times I have opened a cake to find batter. In my opinion, I would rather overcook something because undercooked cake is just bad!
4. Hair or eggshell
I have found both in my desserts. It’s sad to say but it’s true. That’s why I always pull my hair up when I bake, but that doesn’t stop the occasional dog hair to find its way into my food. I would rather have an eggshell because they have calcium and I know what my chickens eat. But Ewww to both of them!
5. Mousse not set or dough doesn’t rise
In this one, only one hasn’t happened. I cook gluten-free most times but my dough always rises! I would rather the mousse not be set because it’s still delicious! I have also had my pudding not set and I whisk in a little whipping cream and it’s saved!
6. Chocolate with fruit or nuts
This depends if it’s chocolate with peanut butter sign me up, but I’m not a big nut person, fruit is good with chocolate, especially strawberries, citrus, and pears! I think I will go with fruit though, who says no to chocolate-covered strawberries?
7. Stand mixer or whisk
Like I said before I can’t whisk anything for too long so I will always bake with a stand mixer unless there is an opportunity of using my hands to knead or mix… whisking is great for small tasks like pastry cream, ice cream, but for anything like cakes, cookies, or meringue I use my handy dandy paddle attachment.
Baking is one of my favorite things to do, if you also bake look in my recipes or all my posts to find a fig cake, tortillas, and more. I will post more recipes this week including a chocolate lover’s dream, the giant chocolate chip cookie 🍪…
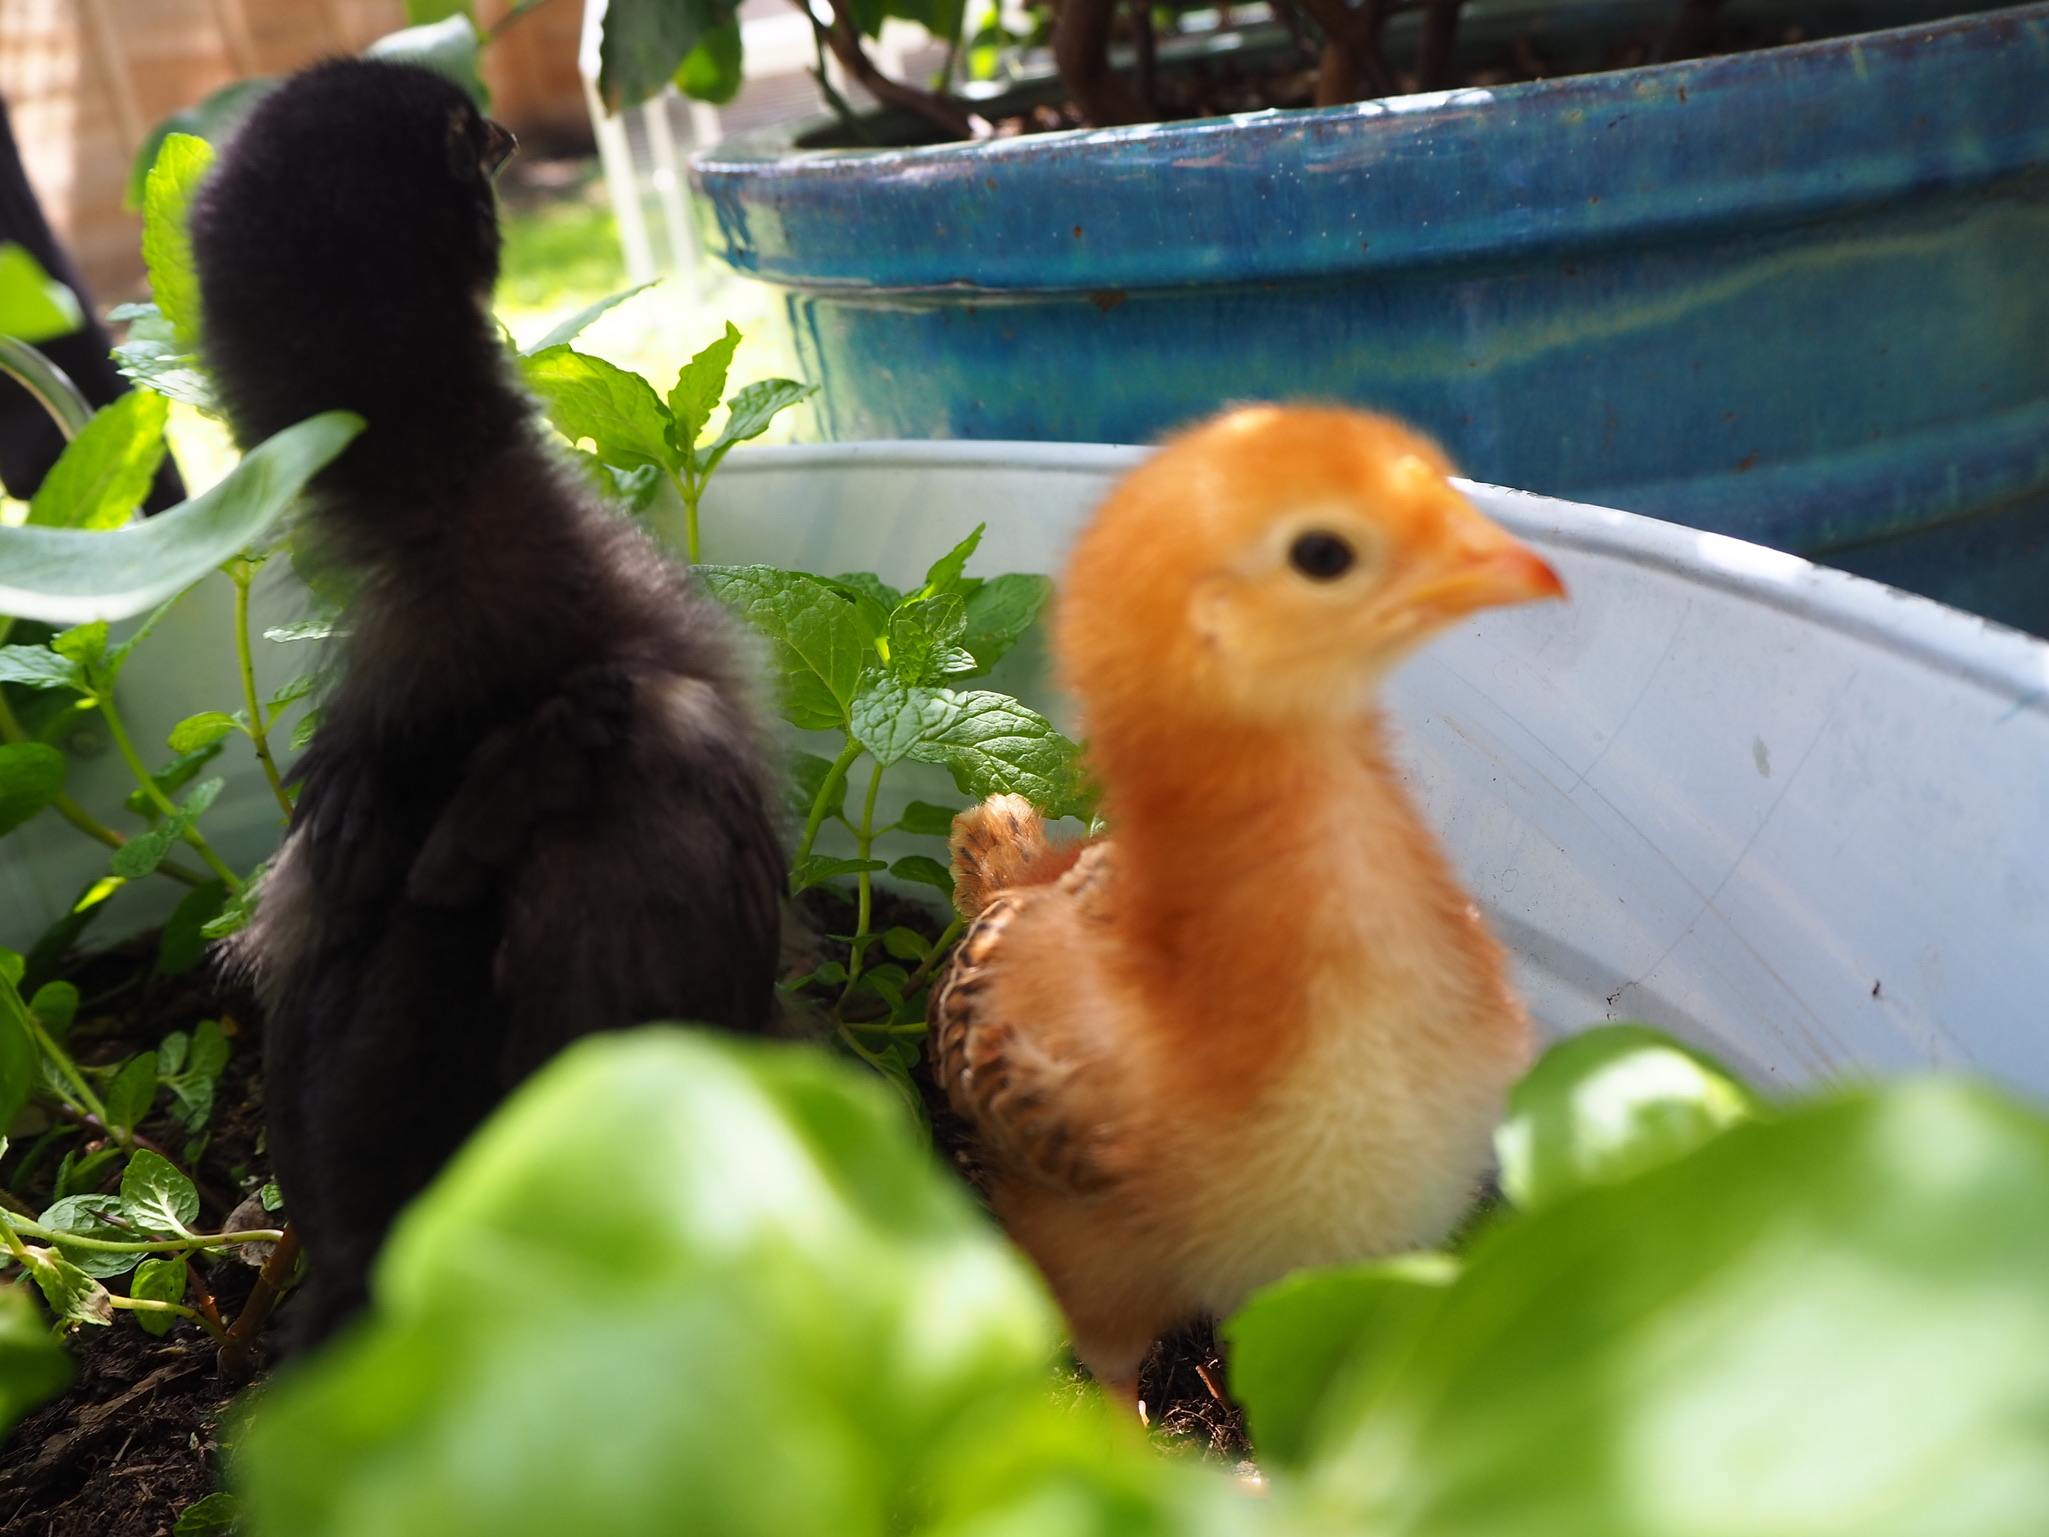
Coconut and Fig are both Plum’s chicks. We got them at 2 weeks old and they were the cutest chicks ever, besides my other chickens of course. From early on we knew that they were close I mean how could they not be? That is why if one is a boy the other will be crushed. They lived in a brooder with their mom because we were told not to separate them or she would forget they were her babies. So they stayed together. But we noticed some of her behaviors were rubbing off on them. Like her anger towards us, which was due to her other life, and her reluctance to eat anything we touched. So after they were together for 3 weeks we separated them. It wasn’t my first choice but I wanted them to live their own lives, Plum was a year old she needed to be out eating grass and with other chickens.
Separation
OLYMPUS DIGITAL CAMERA
When we went to separate them it was hard at first, they were so loving to their mom and we kind of had to rip of the bandaid. Integration was the hardest especially since she was all alone and we had three chickens, but she made it through and we could see she was already changing. She was more accepting of humans, she loved snacks, and even got along with Licorice one of her best friends. We quickly realized that we had made the right choice. Coconut and Fig are both bantam Cochins like their mother but they have very different coloring and different personalities as well.
Coconut
OLYMPUS DIGITAL CAMERA
Coconut is the nicer of the two. She is cautious but unlike her sibling calmer. She is lighter as well, her feathers white and light brown only a little black. Coconut is smaller, her feet paler, she is less food driven then fig but still loves pear, her favorite snack.
Fig
OLYMPUS DIGITAL CAMERA
She is the one we are worried about being a boy although she has a similar temperament she is quicker and more aggressive. She loves food and her favorite snack is papaya or watermelon. She is light white in very few places, and mostly black especially on her tail that sticks out instead of curving. Fig tries to be friends with everyone and ends up getting pecked most times.
Integration
OLYMPUS DIGITAL CAMERA
They are now with the big birds, and because they are still so small we waited as long as we could. Our brooder was in our shed and in the morning we would open the shed door. They preferred to stay in the shed though, with my dad. He works in there and so they like to sit on his lap, head, shoulders, or on his desk. They also pooped everywhere! But when I went to check on them they were always next to him, they loved him more then any human and still like to greet him most days. They still don’t like to be picked up, unlike our other chickens, but that’s ok with me, I think that if they are happy and I gave them a good home, then that’s all that matters.
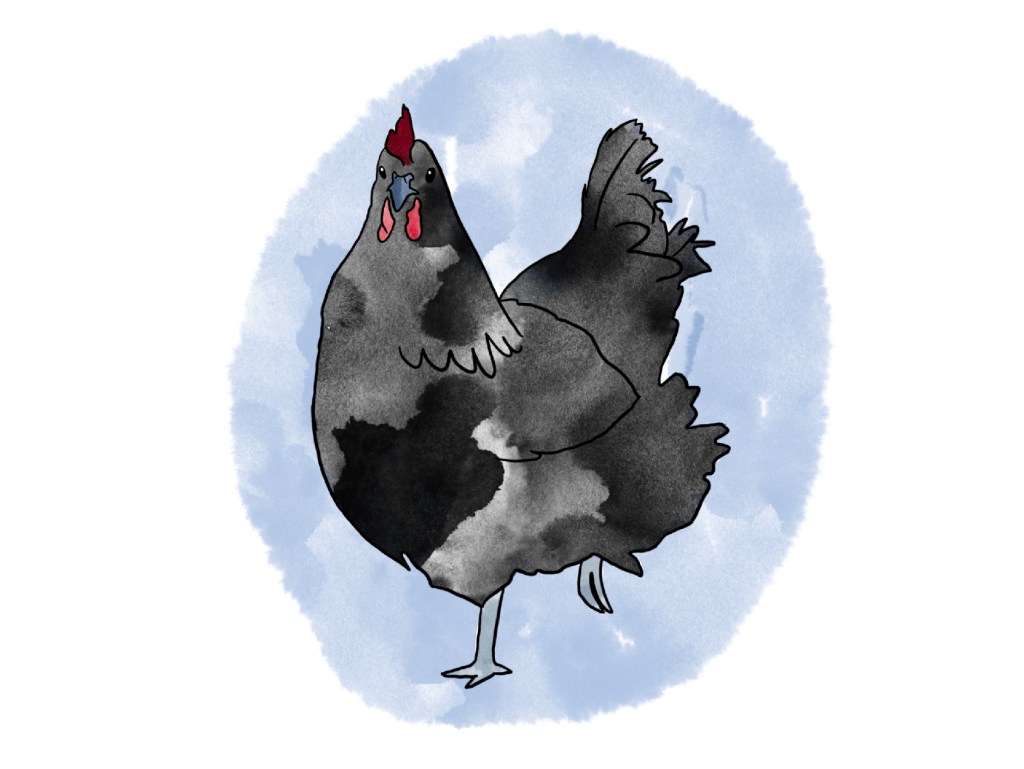
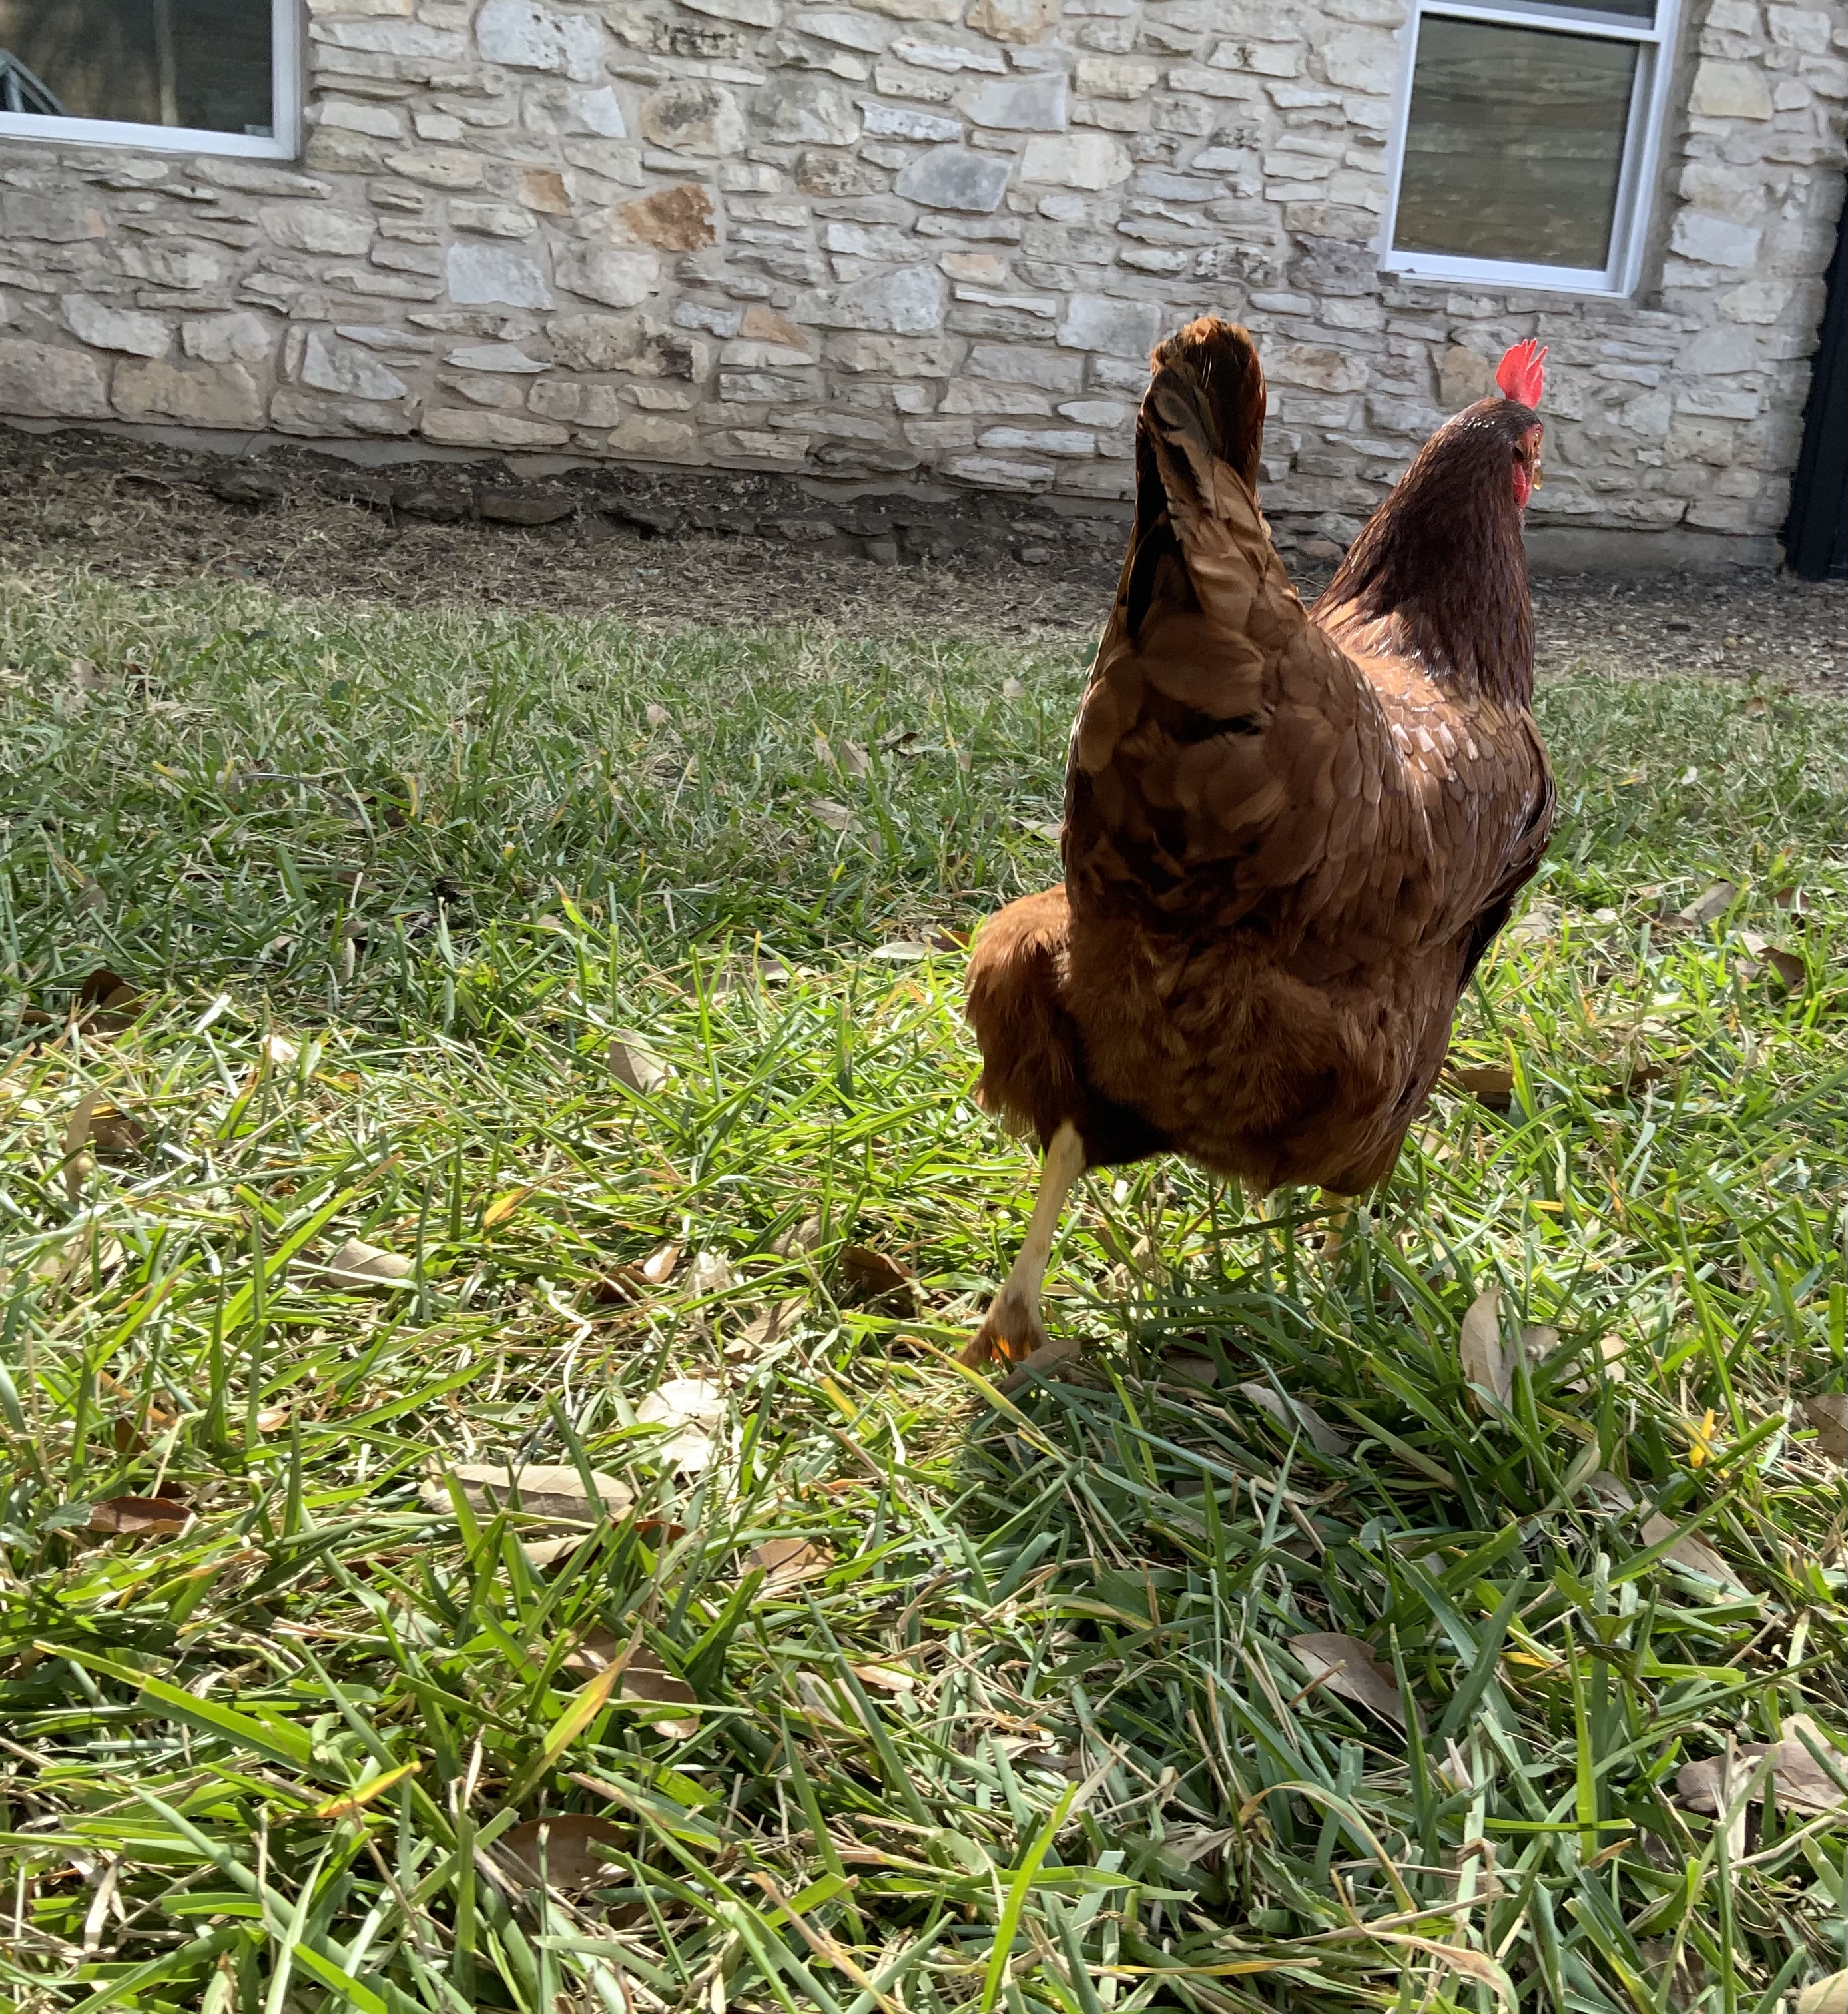
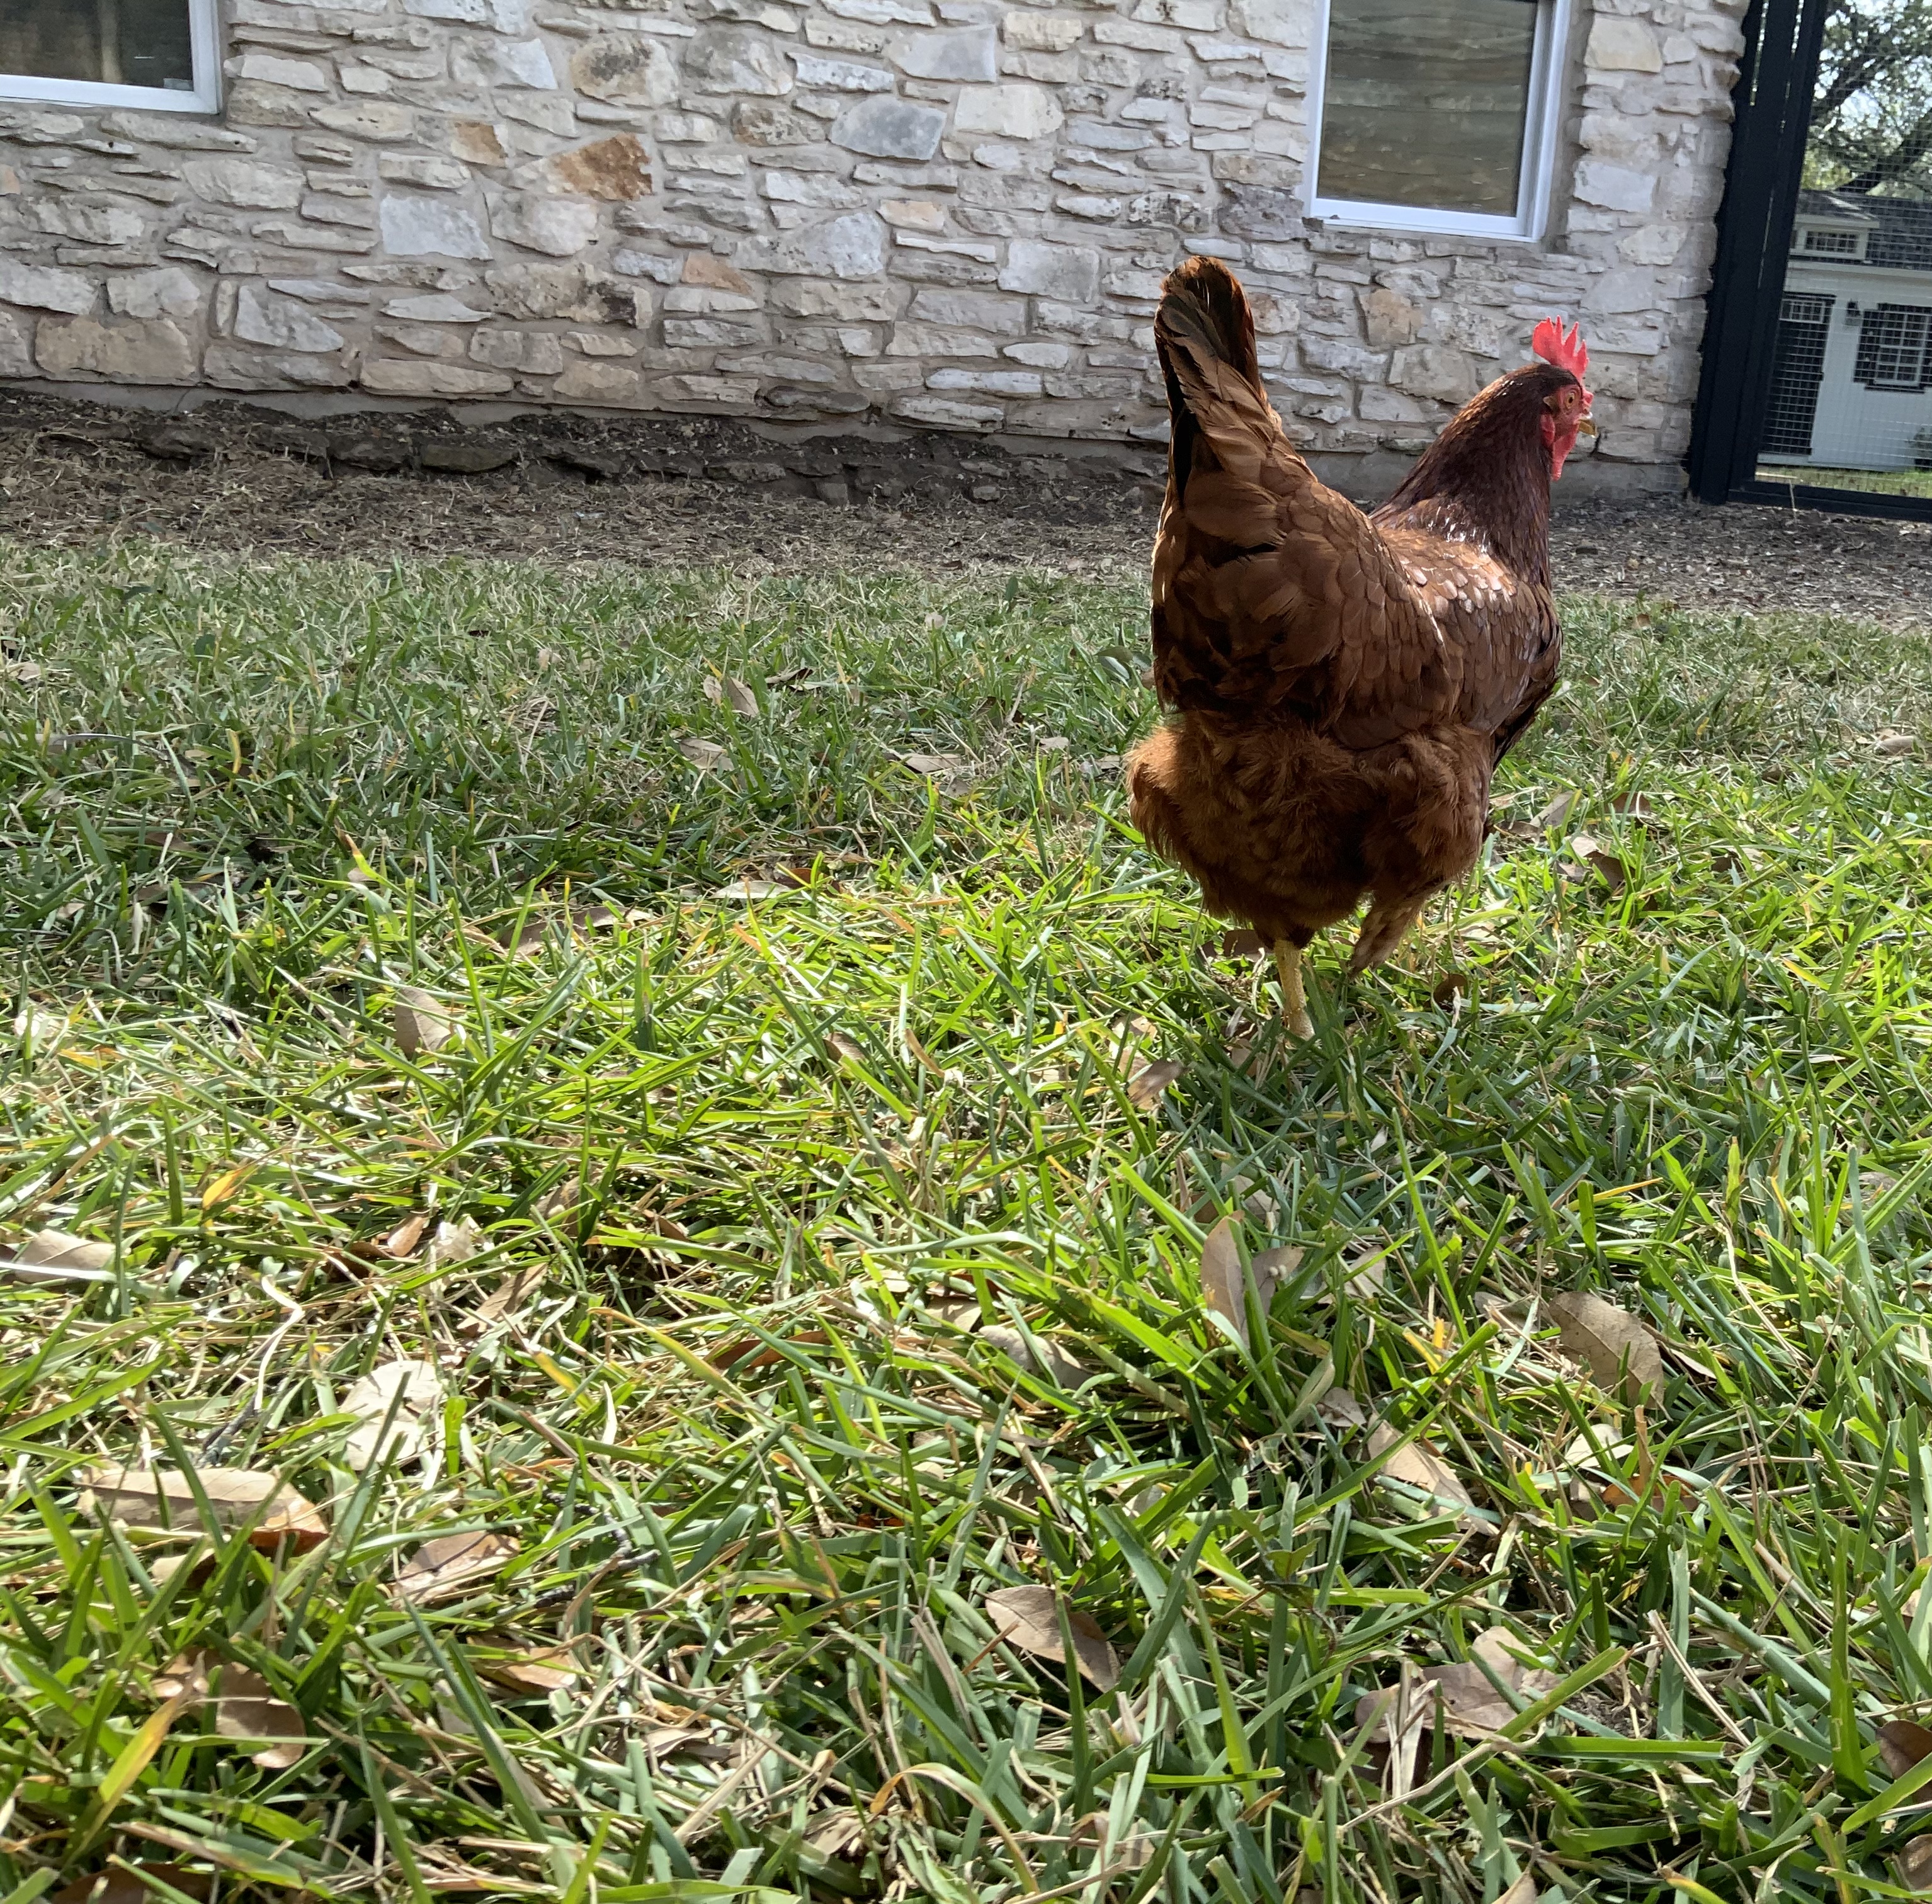
Mango was a beautiful chick, she had the coloring of a mango and the personality to match. The difference between her as a chick is that now she is dark red, and has a bright red comb because she is laying. She is a noisy chicken and doesn’t like the chicks. Mango is smaller and always has her chest out. She gets picked on by Kiwi but only when they are eating and her favorite snacks are peaches and dill.
Anything else
She was the last chicken to lay, laying late for her breed, and for a long time we worried about her size, but she is just smaller and is always walking around. She sticks up for her friends, sits on my lap, and when I put her on my lap she stays. I love her and so do my neighbors in the mornings 🙂